This post originally appeared on Medium by Joachim Holmér, co-founder of Neat Corporation, developer of Budget Cuts. It’s been republished at Upload with permission.
—
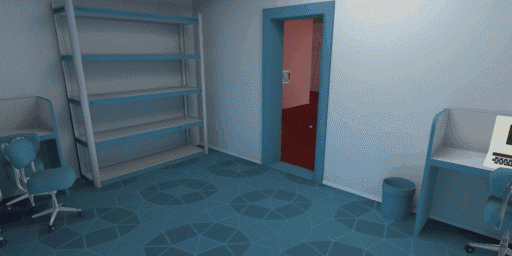
We’ve gotten a lot of questions on why and how we came up with the design of our locomotion system in Budget Cuts — here’s the definitive guide!
Early on, we knew that that we didn’t want it to cause any sort of motion sickness. Motion sickness could be an entire post of its own, but, long story short — we can’t accelerate the player in the game, unless they also feel that acceleration in reality.
This means we’re going to need to move the player in some way that does not involve continuous motion with acceleration. How bad is it? Well, for reference, I played Half-Life 2 in VR for about 10 minutes and felt sick the rest of the day.
The Problems With Point-and-Click Teleporting
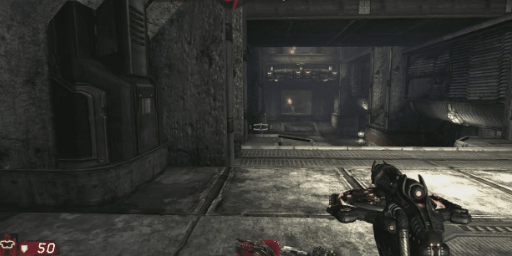
We started out with simple point and click locomotion. You aim the controller where you want to go. By pressing a button, you instantly move to that location.

How does it work? Well, it’s okay at best. Here’s a list of some of its problems.
No Natural Speed Limitation
Regardless of aim location, near or far, the teleport time will remain the same. Just tapping the teleport button over and over to move in tiny increments has a tendency to become the norm.

t looks quite bad, and can actually trigger motion sickness if the steps are small enough to resemble continuous motion. It will also most likely ruin any timing-based gameplay unless it’s fully tied into the design of the game.
There are of course solutions, but many of them are bad. For instance, you can always tack on limiters, making the teleport fade time longer or add a cooldown based on distance. From a player perspective though, they will often feel as if the developer just forced it in, and rightly so.
No Natural Distance Limitation
Having point and click teleportation enables you to aim anywhere and go anywhere as long as the controller has line of sight to the target location. As with the previous point, this is again something you usually want to limit. Not only for gameplay purposes, but also because the further away you aim, the less accurate you’ll be simply due to geometry and physics.

You could add an indicator for when the player is aiming too far away, but this is not a natural limiter. There’s nothing in the game world that says why you can’t go there.
Not Believable in the Game World
Walking makes sense in pretty much any game where your character, or you, have legs of some sort.
But teleporting? Making it fit the game world in a believable way may not sound important, but it’s very important to not remind the player too much of the limitations of VR.
Inaccurate Positioning
In stealth games like ours, positioning is very important. When you’re no longer sneaking in a continuous motion as in traditional stealth games, each step becomes more significant, making it even more important to be precise to accurately see where you will end up.
Knowing who can spot you at your destination is crucial. It’s generally hard to tell where exactly your head will end up, making teleportation unnecessarily unforgiving.
Jarring Transition
When teleporting to a new location, you need some kind of transition. Many games fade to a solid color, then back, in a short span of about 0.2 seconds or so. This works okay. It’s better than instant popping, but it’s still a bit jarring.
Finding a Solution
Let’s solve all of the above, starting with the most important one.
Limiting Speed
This was the first step, since it was one of those things that had to be fixed to even start making a stealth game. We looked back at other teleportation mechanics in games, and quickly realized that even one of my favorite games of the past had a pretty nice one.
The Unreal Tournament series feature a device called the Translocator. It’s a gun that that fires a small beacon. You then press a button to teleport to wherever the beacon is at.
This solves the speed limit problem in a natural way. The player has to wait for the beacon to land, which caps the player speed at the speed of the beacon. The waiting is also natural, because the player can intuitively see that the beacon has to land before teleporting, as opposed to waiting for a cooldown.
Guess what? This doesn’t just solve the speed limiter problem.
Limiting Distance
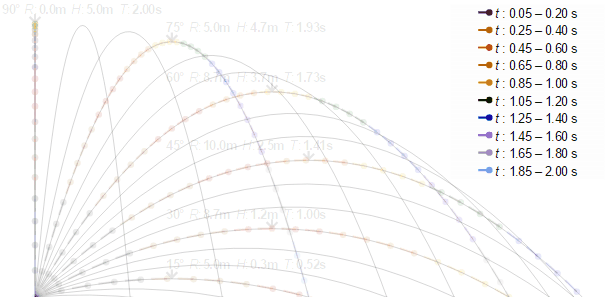
The Translocator method also solves the distance limit problem, because your teleport distance is now determined by, well, physics. The launch speed of the projectile means that you can aim up and down to tweak the distance you travel, and it naturally can’t fly however far you like, since gravity and friction is going to put it to rest.
As an added bonus, this makes it easier to teleport up onto ledges without having direct line of sight to the ground.
Making it Believable
Even this is pretty much solved now too. You now fire something that feels linked to you. You have to watch it traverse first before you can go to your new destination. You now have a physical connection to the other side, before you yourself are there. It’s also easier to fit a teleportation device that is more physical into a game narrative.
The Translocator fixed a whole lot of problems. Two to go!
Accurate Positioning
Given how important positioning is in stealth games, knowing exactly where your head is going to be after moving is crucial. It’s easy when you’re moving in very small steps, but for a long distance teleport, we need to help players see exactly where they’ll stand once they teleport. We could have a remote head model when the Translocator beacon lands, showing where it would end up, but this is hard to visualize at longer distances.
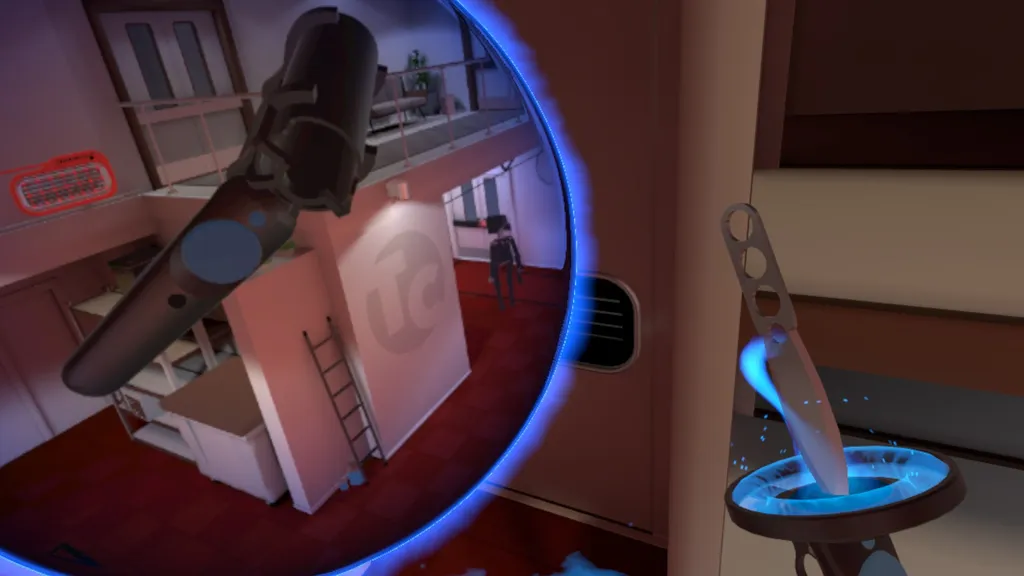
This is where the portal comes in.
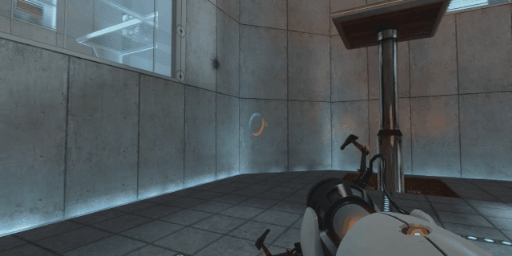
As it turns out, showing where you’ll end up by showing where you’ll end up is a great way to show where you’ll end up. We decided to use a portal for that!
When the beacon lands, we open up a portal in your hand. The inside of the portal shows what it would look like if you were to stand at the teleport beacon. Meaning, if you look inside the portal and teleport, nothing inside the portal is changed when you press the button to teleport, because it was already showing the destination viewpoint, while the outside is then of course no longer showing where you teleported from.
So why does this help with positioning? You as a player can see, with no ambiguity, exactly where you’ll stand once you teleport. This also means that even after the portal is open, you can walk and lean around to change your positioning. You can move the portal around and look in all directions to see what the other side looks like before deciding to teleport or even cancel it, which makes it much less of a commitment.
Smoothing the Transition
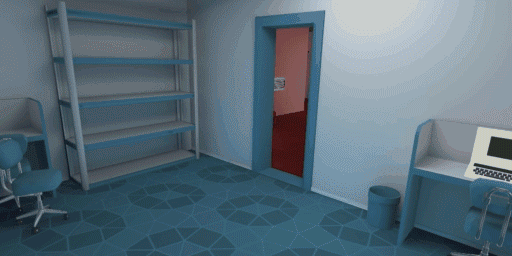
Given that we now use a portal, we can make a super smooth transition by simply wrapping the portal around your head until all you see is the content of the portal. This makes it a smooth spatial transition, with no acceleration applied to the player!
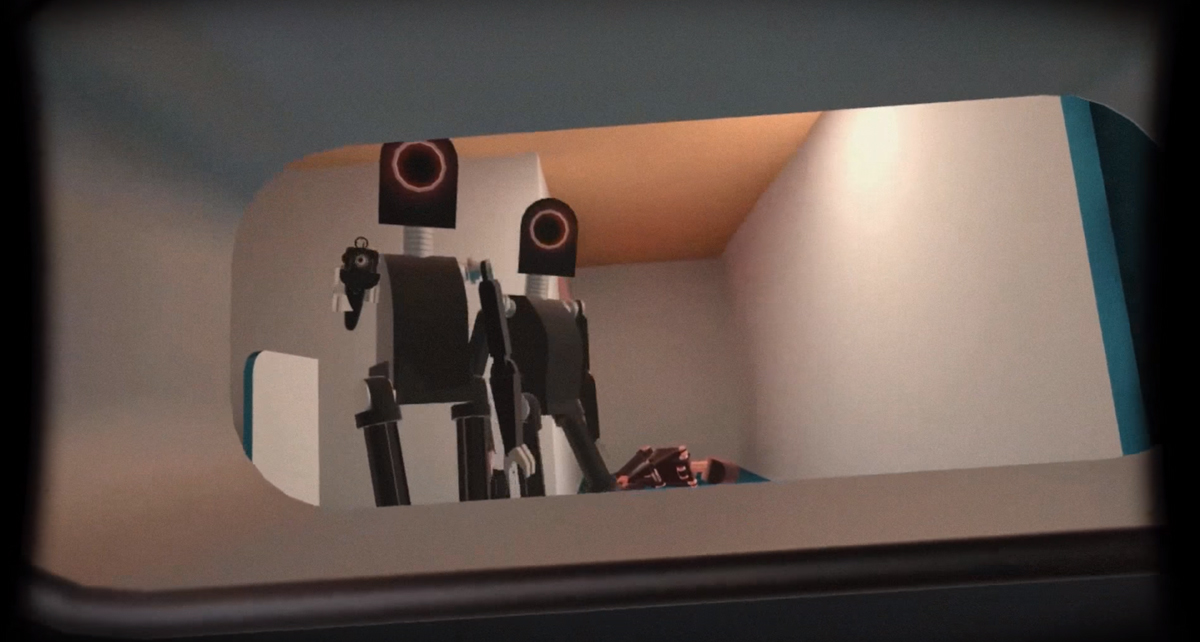
There are a few design caveats to consider when doing this transition. We had several instances of players being killed mid-transition by enemies in their previous location, which was rather frustrating.
We now put the player interactions and colliders at the remote destination immediately, while leaving the rendering behind. This makes sure that your actions mid-transition are properly done in the new location.
Another problem is that the transition time will appear to vary depending on where you hold the portal. Our first iteration simply expanded the portal until it encapsulated the player, from the position you held the portal when pressing. This caused a problem where the transition appeared to be done when it was halfway when held in front of you, even though it was not. This is because halfway through, it covers your entire field of view. This is not the case if you hold the portal behind you, where halfway through you still aren’t seeing the transition sweep.
Our solution to this was to only expand the portal halfway, but also slerping it toward the direction you’re facing, ensuring that it always covers your field of view, regardless of where you were initially holding it. The slerp also helps make sure we can have a consistent transition time even when holding the portal behind you.
I hope this has been a helpful insight into our design process!
Your game may have different challenges to tackle, depending on what type of gameplay you’re aiming for. The important part is to ensure you don’t trigger motion sickness while keeping a critical eye on the design of the game to see how the design of your locomotion system ties into it.
An example of a game that borrowed some of these elements, and tweaked them to fit their game, is The Lab by Valve. They have the arc drawn while aiming the teleporter, but they skip the physical object altogether, and only use it as a natural distance limiter.
In any case, that’s all for now! I’ll probably make a more technical breakdown on how we created the portal itself at some point, if you’re interested! Thanks for reading!
—
This post originally appeared on Medium by Joachim Holmér, co-founder of Neat Corporation, developer of Budget Cuts. It’s been republished at Upload with permission.