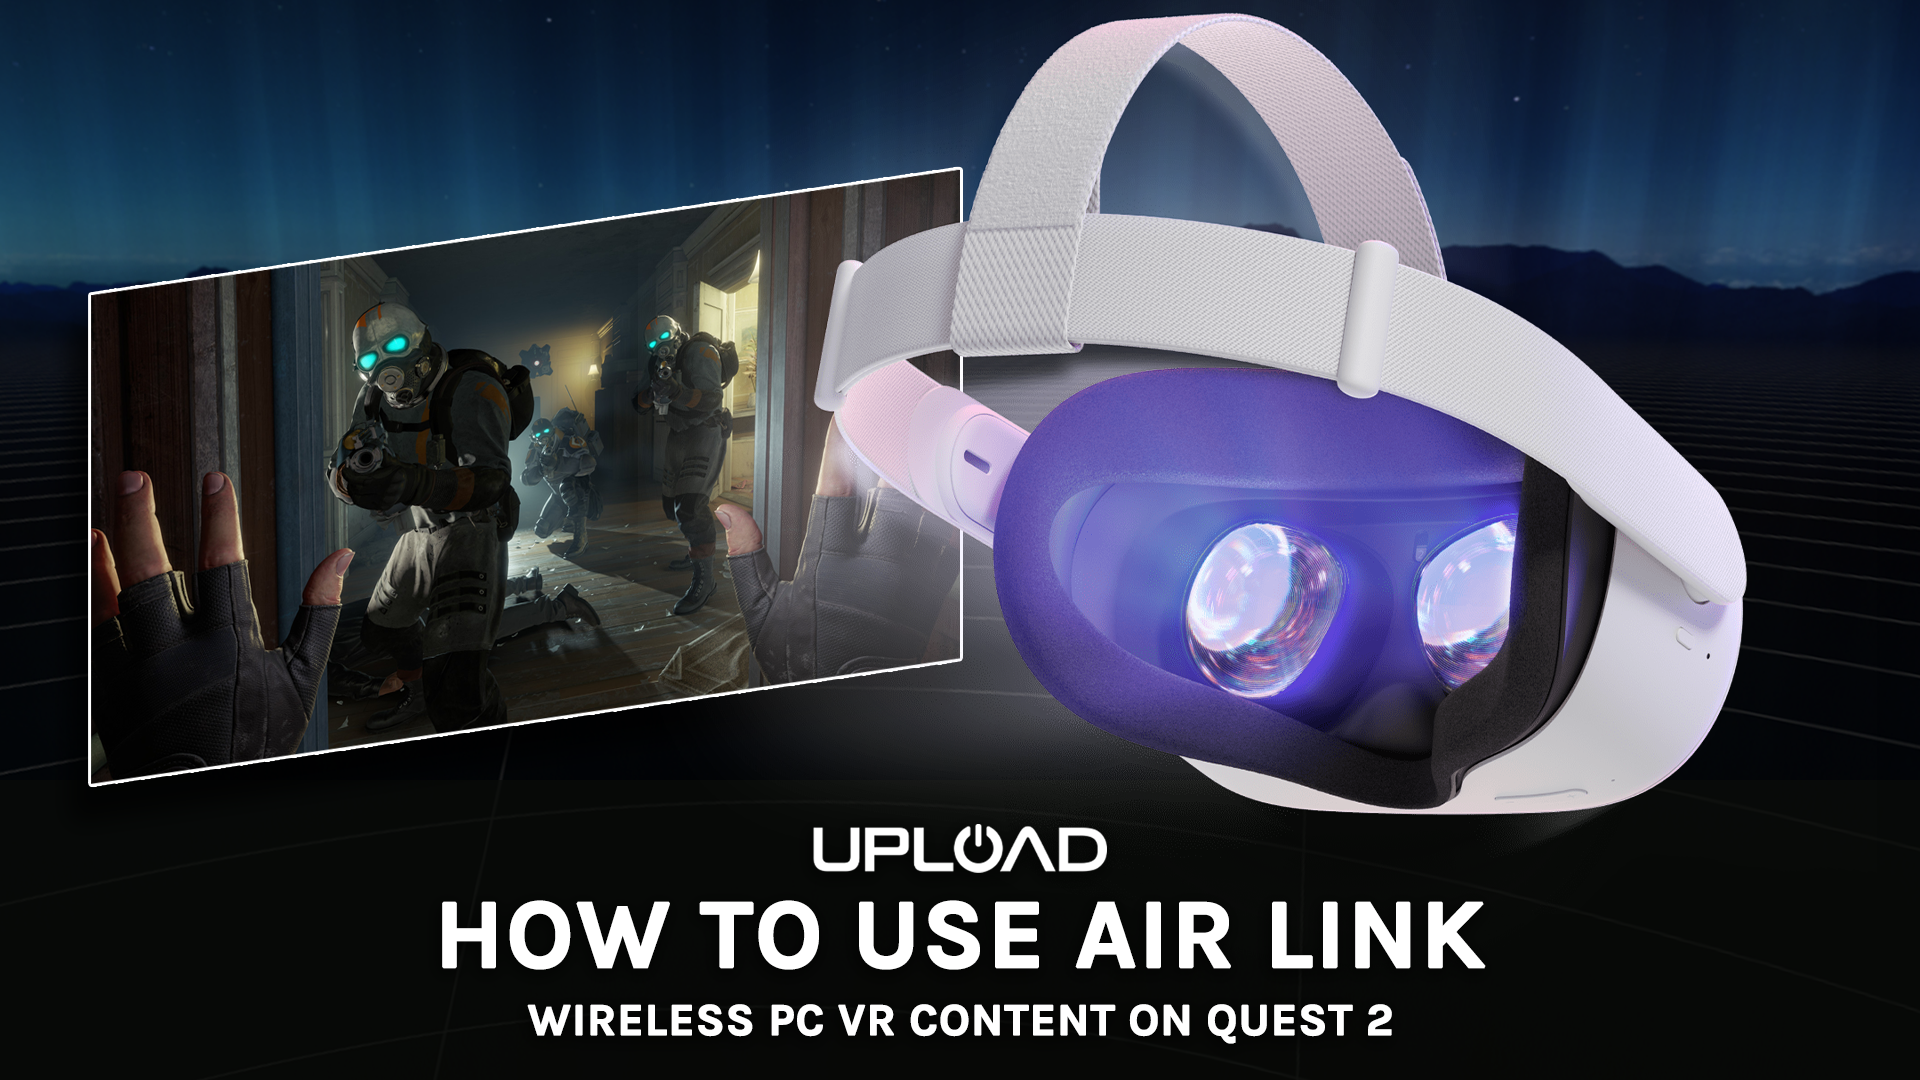
Want to play PC VR content wirelessly on your Oculus Quest or Meta Quest 2 using Air Link? Here’s everything you need and how to do it.
Note: This guide was first published in April 2021, but has since been updated and republished– most recently in May 2022 — to ensure all information remains correct and up-to-date.
The video below was published in April 2021, but remains mostly accurate — the PC toggle step in the Beta section is no longer required and the Quest settings menu is now laid out differently to the footage above, but the core process and steps remain otherwise the same.
The Meta Quest 2 (formerly Oculus Quest 2) is a fantastic standalone headset from Meta (formerly Facebook). There’s heaps of native content available on the Oculus Store, but one of the key features of the Quest platform is the ability to also play PC VR content as well, while connected to a VR-ready PC.
Meta’s official method, Oculus Link, launched in late 2019 as a wired solution for playing PC VR games on Quest. However, Air Link now allows you to play PC VR content on the original Oculus Quest and Quest 2 wirelessly. Here’s how to do it.

VR-Ready PC
Just like with a regular wired Link connection, in addition to a Quest headset, you will also need a VR-ready PC for Air Link.
Take a look at Meta’s Oculus Link compatibility page to see if your computers meet the minimum requirements for Oculus Link. While this was written for wired Link connections, it’s still a good way to gauge if your PC is VR-ready for Air Link too.
The specification requirements will change depending on the game as well — some PC VR games require beefier specs than others — so be sure to check game requirements too.
Note: The Windows 11 update earlier this year brought with it some performances issues for those using Air Link. We strongly recommend not using Windows 11 if you’re looking to play PC VR content on Meta Quest 2 until the issue is resolved.
Software
Download the official Oculus PC app, which is the software that will run Oculus Link and allow you to play PC VR games on your headset. You can get it here, listed as a download for Link Cable and Air Link. You’ll also want to make sure your Quest is up to date with software updates, which you can check in the headset settings menu.
Wi-Fi Router
Much like Virtual Desktop, Air Link requires a good Wi-Fi router with a stable internal network connection in order to run reliably. Meta recommends that you use a 5Ghz network running on an AC or AX router. It’s also recommended that the PC running the games is connected to the router directly via ethernet cable and not Wi-Fi — the latter is known to cause connection problems. Meta also warns that mesh networks can cause problems with Air Link as well.

Enable Air Link on Quest/Pairing Your Quest
First, ensure the Oculus PC app is installed, open and connected to your network. You’ll then have to enable Air Link on Quest, as the feature is still experimental and not in official full release just yet.
To do this, go to the Settings menu on your Quest and then head to Experimental Features. In this tab, there will be an option to turn Air Link on.
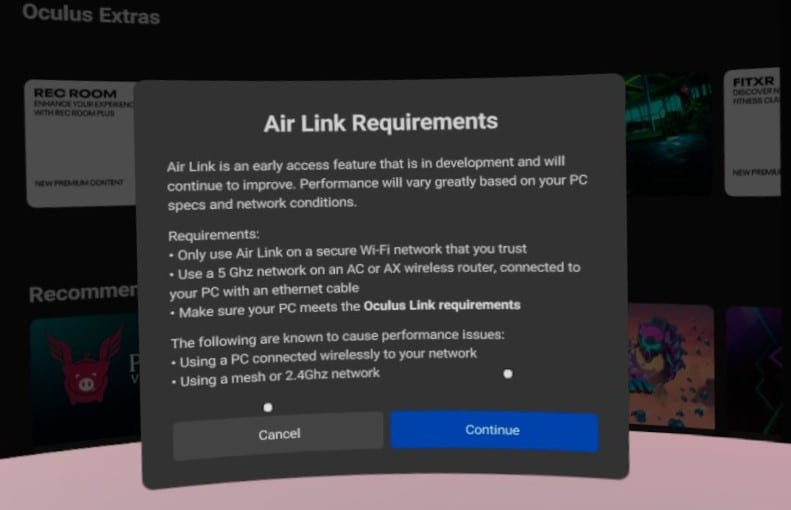
When turning Air Link on, you’ll see a dialog box warning you of the necessary equipment and setup for an optimal experience– select continue.
Once turned on, you can access Air Link from the Quest’s Quick Settings menu, pictured below, accessible by selection the bottom left of the Quest taskbar.

The first time you open Air Link, you’ll have to pair with your PC. Select your PC from the list of connected devices on the network. You may have to confirm a pairing code displayed on your PC as well.
Starting Air Link
Once turned on and paired, you can start Air Link from the Quick Settings menu in the Quest toolbar at any time. Just ensure your desktop PC is on and the Oculus app is open, and you should be good to go.
Once Air Link has started., the process to play PC VR games should be exactly the same as using a PC VR headset natively or using a wired Oculus Link connection. Enjoy!

Adjusting Air Link Refresh Rate and Rendering Resolution
Once you’ve got Air Link up and running, you can switch between 72Hz (the default, recommended option), 80Hz, 90Hz and 120Hz refresh rates. However, this is only available to Quest 2 users — those using the original Quest can only run content at 72Hz.
To do this, connect your Quest 2 to your PC via Air Link and go to the Devices tab in the Oculus PC app.
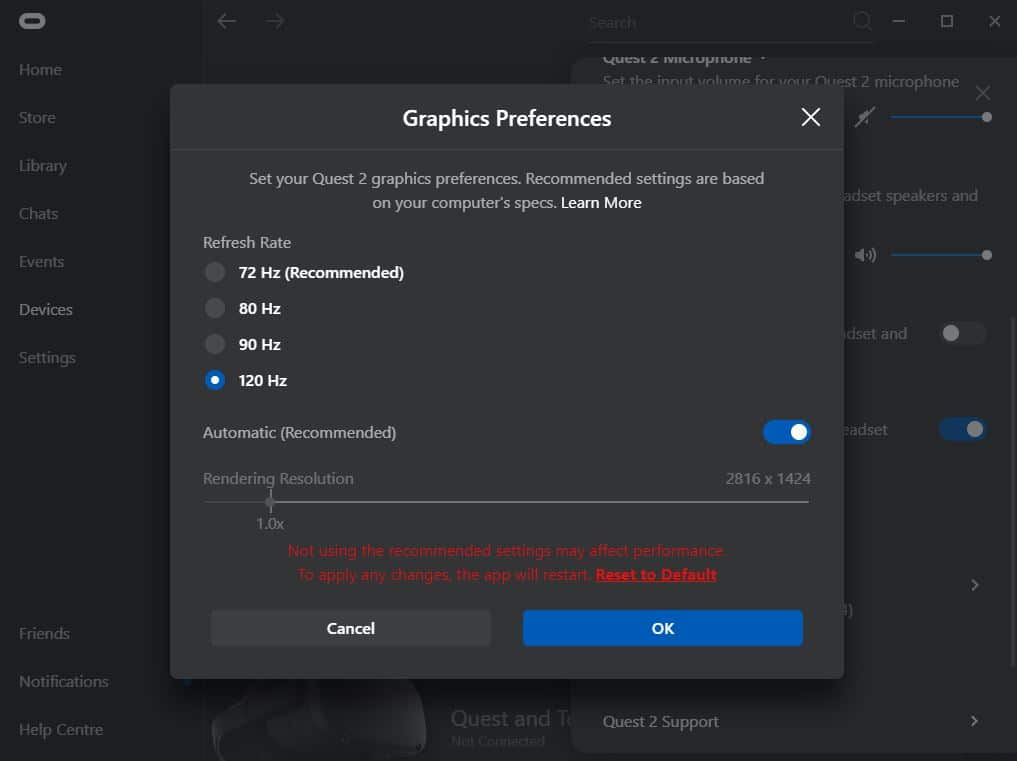
If you click on the active Quest headset, a settings sidebar will be brought up. Click on Graphics Preferences to adjust the refresh rate and rendering resolution, as pictured above. Setting these options too high will impact performance — it depends on your PC hardware and potentially what game you’re playing, so test and adjust accordingly.
Debug Tool Settings
Having troubles with performance? If you’re sure your network is up to snuff, then there may be some other fixes you can try. Users on Reddit have noted that a setting in the Oculus Debug Tool for Oculus Link can affect Air Link latency and performance (even though the setting in question is only meant to affect wired connections).
If you’ve adjusted your Oculus Link bitrate in the debug tool, you’ll need to set it back to 0 in order to get proper Air Link performance. The Oculus Debug Tool can be found in Program Files\Oculus\Support\oculus-diagnostics\.
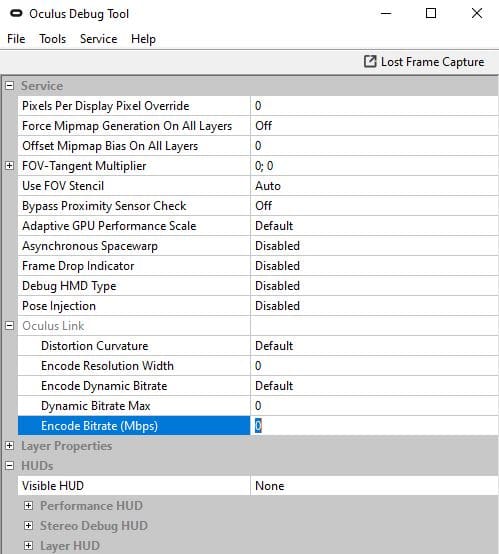
Once you’ve opened the debug tool, find the Encode Bitrate (Mbps) setting under Oculus Link — make sure it’s set to 0 before using Air Link for optimal performance.
Bitrate Adjustment
There’s also a new setting in Oculus Dash that allows you to adjust the bitrate of Oculus Link while using Air Link, which may improve performance.
The setting can be found in the Air Link panel of Oculus Dash, and will allow you to choose from either a dynamic bitrate or a static bitrate.
The bitrate is the amount of data being transferred over Air Link to your Quest — a higher bitrate will mean higher quality, but it may increase latency and introduce stuttering.
This setting will have to be adjusted on a case-by-case basis — the upper limit of your bitrate will be determined by the specs of your PC and how much it can handle.
A dynamic bitrate will automatically choose what’s best according to how your equipment is performing at any given time — if you don’t know what you’re doing and don’t want to mess with anything, use this option. A static bitrate will allow you to set a consistent quality level, but has the potential to impact performance. If you want a static bitrate, fiddle around with the slider to find a setting that gives you the best quality without compromising performance. If you go too high and Air Link freezes up, the setting will be reversed within 10 seconds automatically.
If Air Link doesn’t perform well or you just want to stick to a wired connection, check out our comprehensive guide for PC VR content on Quest, including using Oculus Link for a wired connection and Virtual Desktop as an alternative wireless solution.