Livestreaming is a big part of the gaming community these days. Millions of people watch gamers from around the world play games on Twitch, Facebook, YouTube, Mixer, and more every single day. While the most popular games are non-VR shooters and MOBAs, there is a growing focus on VR gaming on these platforms as well. Here at UploadVR we stream our VR games on Twitch (in the past we did YouTube and Facebook as well) and try to show off all of the latest and best games — as well as have some fun with viewer recommendations.
What I realized is that we get asked a lot about what we use to stream, how we do it, and what you need to get started. That’s where this guide comes in. I won’t pretend that I can give good advice on best practices and how to build a stream community (I can’t) but I can tell you the technical side of how we do what we do and what works.
Continue reading for our guide on how to stream VR games from Rift, Vive, PSVR or any other VR headset to services like Twitch, Facebook, YouTube, Mixer, and more.

What You NEED To Download and Buy
The most important part of getting ready to stream VR games is that you download the proper software. If you’re playing PC VR games with a Rift, Vive, Windows VR headset, something else, or even if you’re on PSVR, Oculus Go, or any other non-PC headset, you absolutely need Streamlabs OBS. No questions about it. Streamlabs OBS is a streamer-specific version of Open Broadcast Software (OBS) with tons of added functionality that makes streaming super easy and painless.
If you’re streaming on an Oculus Rift specifically then that means you have the Oculus Dash feature that allows you to quickly and easily access your desktop. You can do this to check chat quite seamlessly. But if you’re on an HTC Vive, Windows VR, other non-Rift headset, or don’t like using Dash, then you should use OVRDrop. This lets you pin a window anywhere in 3D space around you or attach it to one of your VR controllers. When I use it I have it setup so that it’s invisible unless I flip my left controller upside down and specifically look right at it as shown in this video.
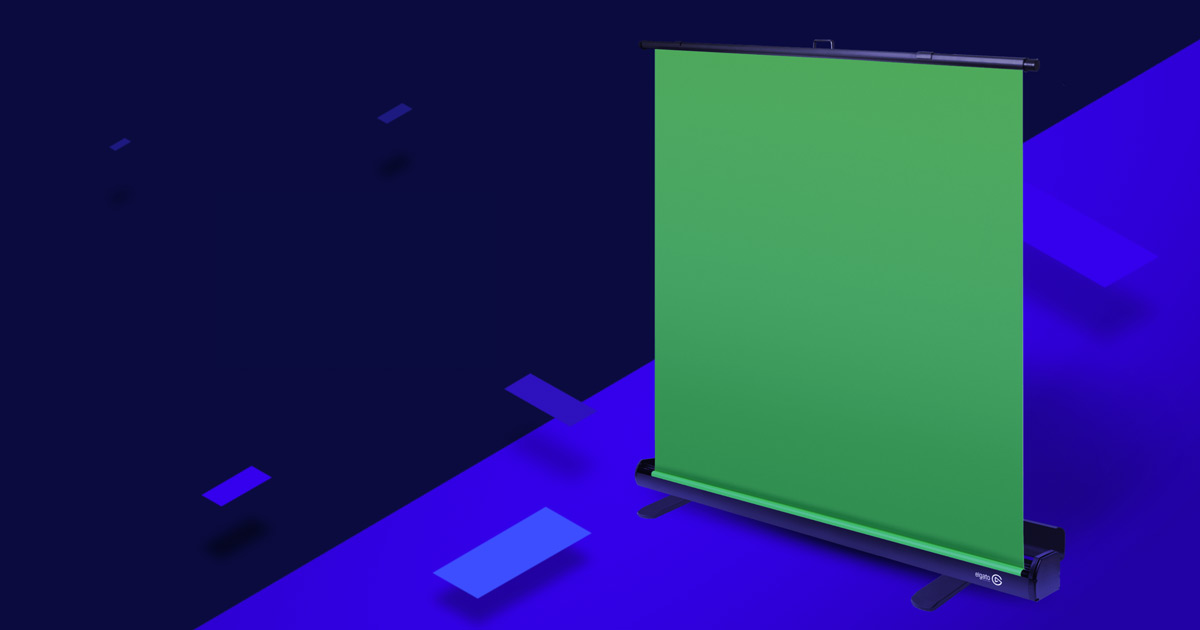
You also need to buy a webcam. If you’re shy about being on camera, get over it. Being in VR helps a bit with that aspect because you feel hidden inside the headset. But if you’re streaming games, especially VR games, people want to see you and what you’re doing in real life to create the things inside the game. It’s essential. This is a good, affordable option. For more on using a green screen (not mandatory but encouraged) check out the bottom of this guide.
Finally, you should download and install LIV for mixed reality if that’s what you’re interested in doing. You can get it here. Read more about mixed reality at the bottom of this guide.
Streaming High-Quality PSVR Without Rounded Edges
The PS4 has built-in streaming capabilities that work pretty well. You can go live to Twitch or YouTube directly from your console without needing any other equipment at all — it even works for VR games. The great thing about this is that it displays chat messages right there in your field of view inside the headset. But the end result isn’t very high resolution and it has awkward rounded edges at the far ends of the video feed so it doesn’t look great.
Here’s what the native PS4 streaming looks like for VR games:
If you want something that looks much better with a crisp output, higher resolution, and the ability to place overlay images, use Streamlabs OBS, and more — then you need to get an external capture card.
Here’s what a PSVR stream looks like with a capture card and full setup:
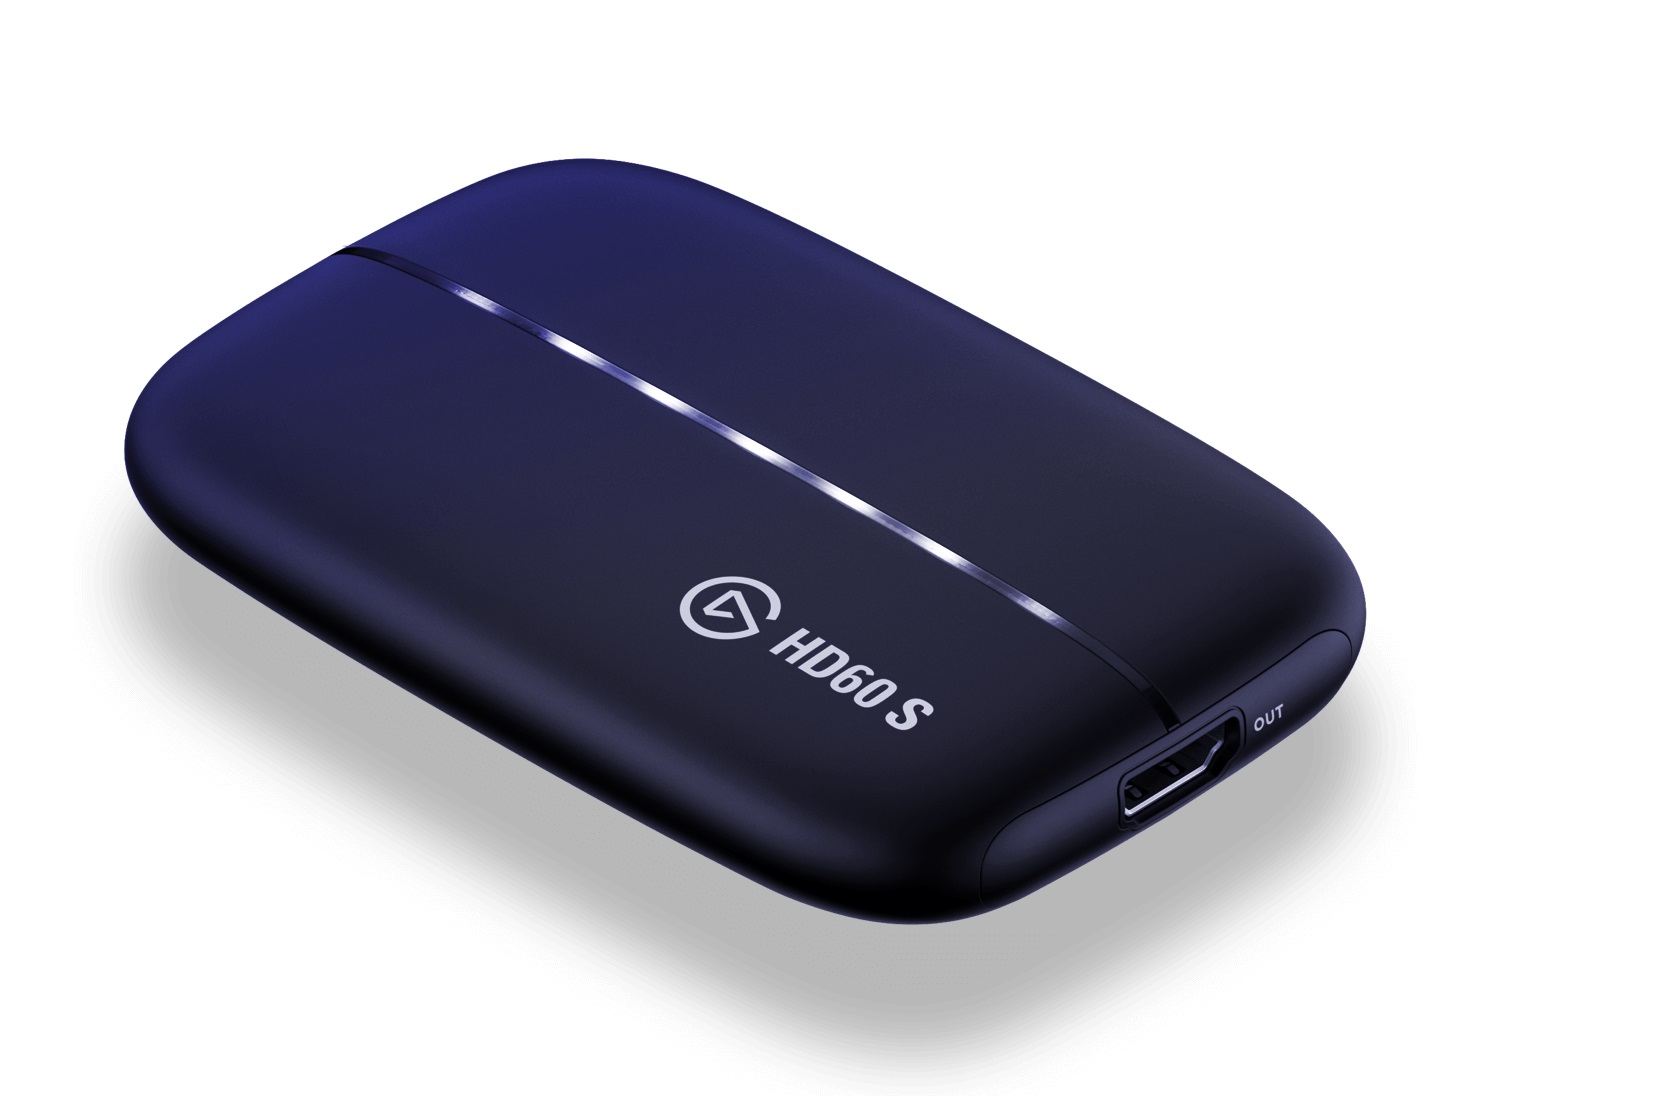
The capture card that I recommend and that I use for not only PSVR but also my Xbox One and Nintendo Switch is the Elgato HD60 S. It’s excellent. When you use it you’ll install the Game Capture HD software, which allows for streaming and capturing, but I prefer to just source that window into Streamlabs OBS so I can manage everything from there instead.
And because of the way that my office is arranged I don’t have room right in front of my TV to do streaming with PSVR so I actually have my PS Camera on top of my monitor, right next to my webcam, and I used this proprietary extension cord to make that happen.
Finally, since you’re pumping all of this stuff into your PC through Streamlabs OBS, if you want to have friends to talk to on Discord while you’re streaming or if you want to hear the notifications as they happen, then you should get a good pair of wireless PC headphones instead of plugging into your PSVR headset. If you only listen to your PS4 audio you’ll miss anything that’s also playing on your PC. I’m a big fan of LucidSound devices, personally.
Picking A Streaming Platform
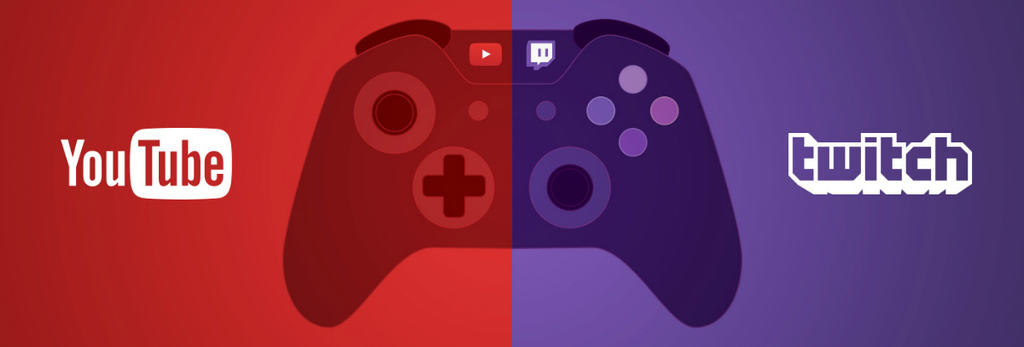
There are more ways than ever now to stream your games online and we’ve used a lot of them. We decided to focus on Twitch for our gaming content because that’s what everyone on that platform wants to see anyway, it’s the market leader, and we found good traction there with becoming affiliated very quickly. However, YouTube, Mixer, and Facebook are good options as well.
Basically it comes down to two core questions: 1) Which platform do you have the biggest audience already, and 2) Are you intending to monetize and stream seriously? If you already have a lot of YouTube subscribers it make more sense to stream there and focus on that audience. Or if you want to start fresh on a young platform without as much competition, Mixer could be good. Facebook is great as well and they’re pushing content creators more these days, so if you have a big audience with your brand page or video creator page, then go for it.
Ultimately it’s just up to you. I’d highly recommend looking up to the revenue options with all of the platforms to see what seems to be the best or most fair and what you think you can attain in a reasonable amount of time.
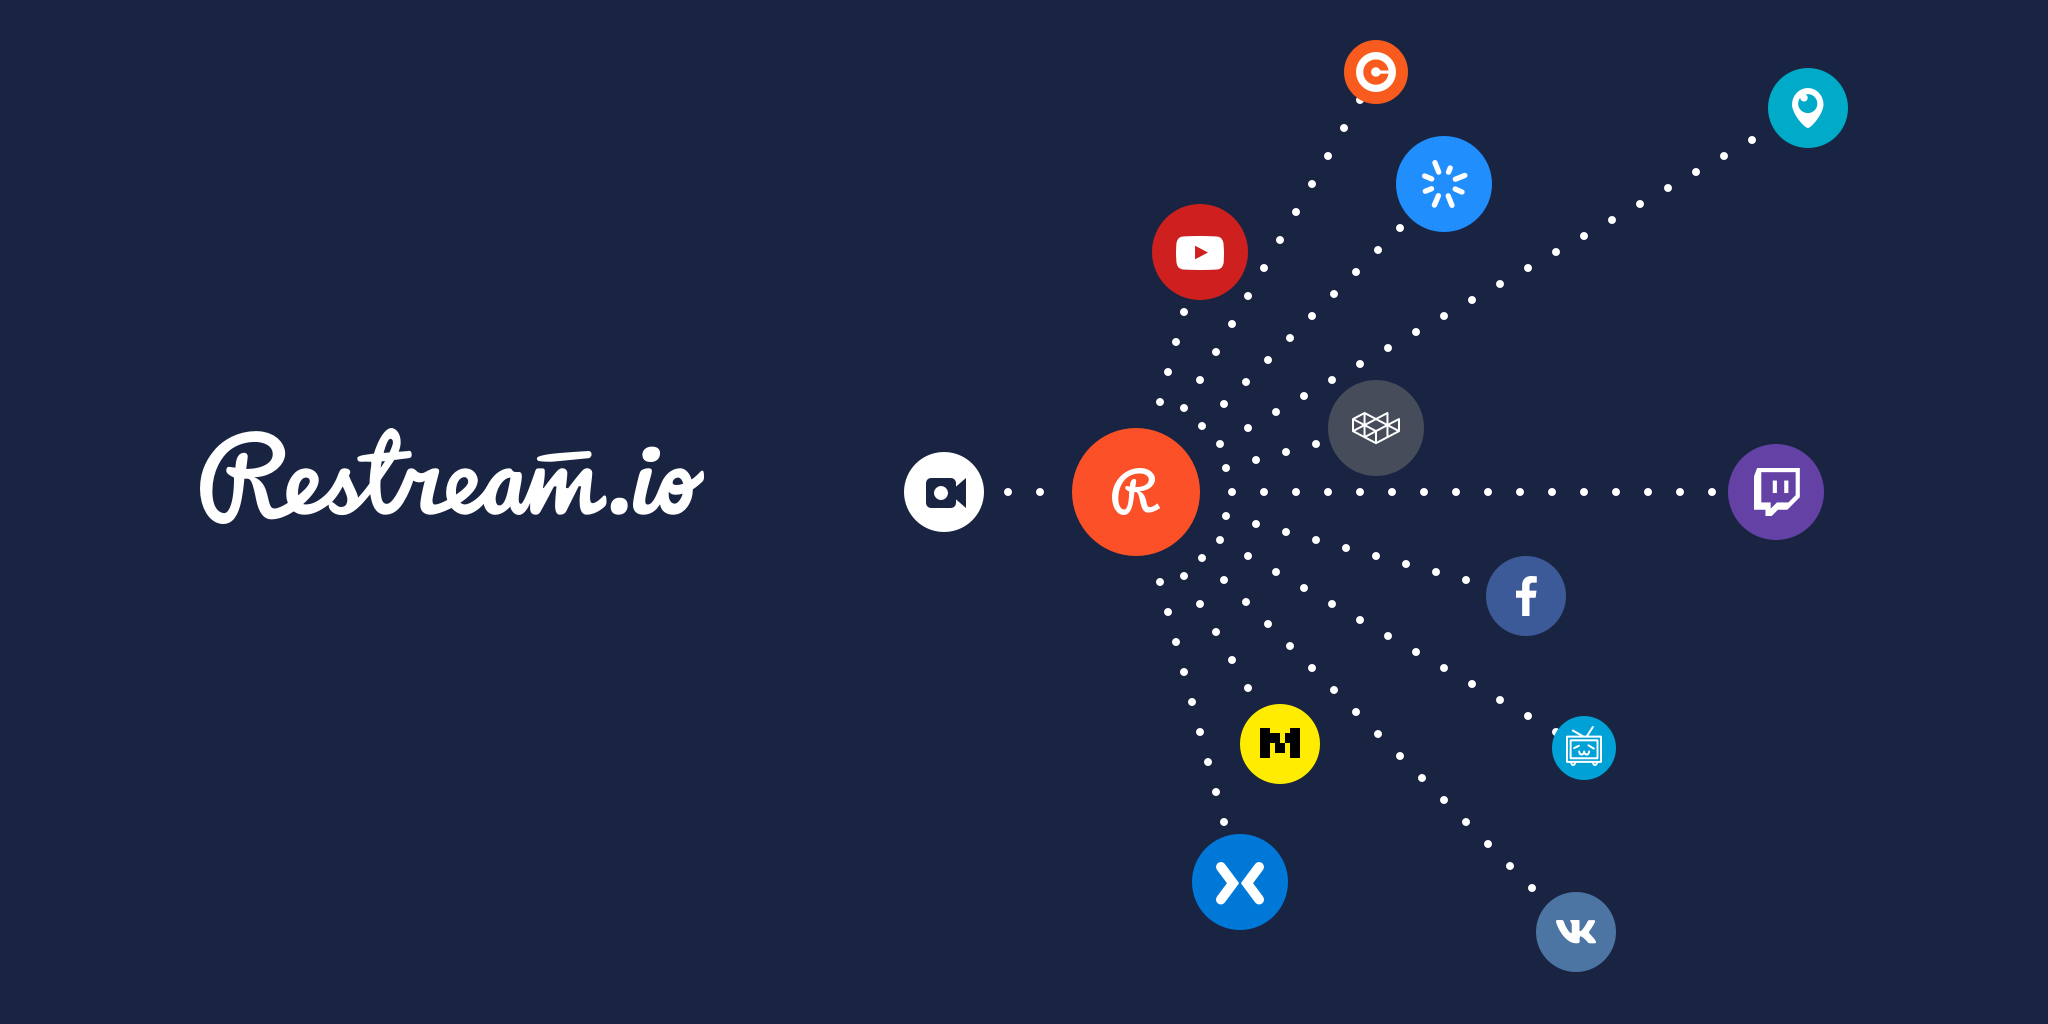
Multistreaming With Restream
If you are just getting started — as in you have no audience at all really and want to do this for fun and see how it goes — then I’d recommend using Restream. That’s what we did for a while too. Restream is a great service that allows you to stream to tons of places all at once. We used to stream our content to Twitch, Facebook, YouTube, Mixer, and Twitter/Periscope simultaneously. We can’t do that now that we’re affiliated on Twitch though.
But this is a great way to dip your toes in the water and see what sticks. Plus, Restream has a handy chat app that displays all of the chat messages in one box so you can monitor everything very easily. If you’re streaming with an HTC Vive or Windows VR headset, OVR Drop makes it super simple to check chat using the Restream chat client. Here’s a video showing what that looks like.
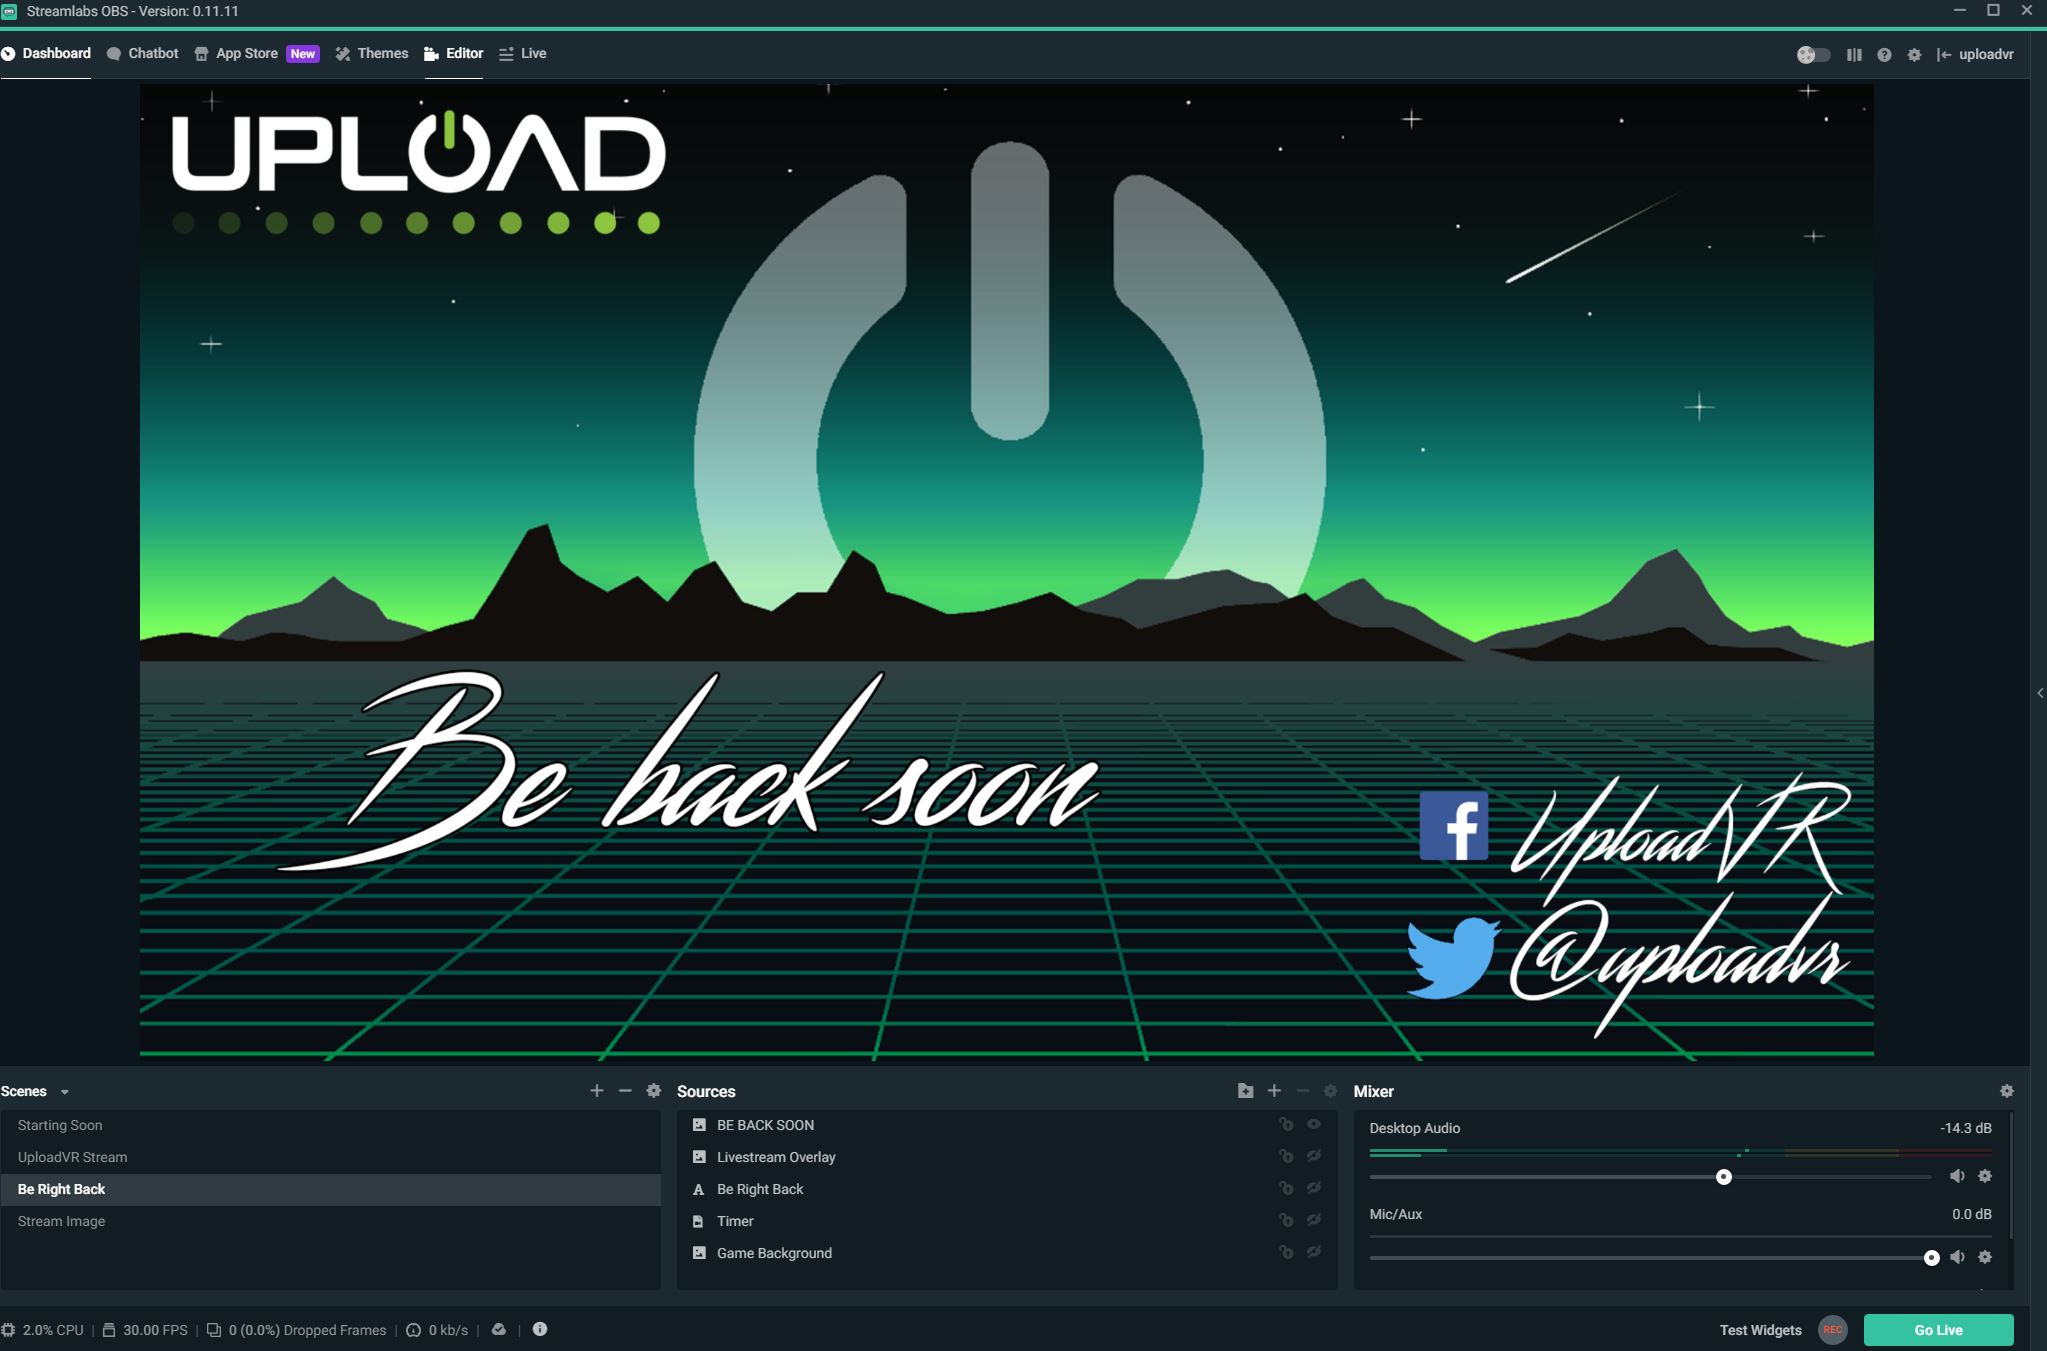
Setting Up Steamlabs OBS
The setup process is pretty simple. You create an account, pick your streaming platform, and then you’re basically good to go. They also have a ton of great documentation on the website. From the Editor view you can see in the bottom left corner a box for “Scenes” — this is where you setup the different views that your streamers will have. To the right of that are the Sources that you use to setup your scenes.
For example, you could have a “Stream Starting Soon” scene that shows a static image, or video, and has a spot for chat to appear, and maybe your webcam too so that everyone can see what you’re doing while you get ready. Then you should have your main game view scene with the game window, any overlays you want to use, a spot for your webcam, chatbox, alertbox, etc. I also have a “Be Right Back” scene in case I need to step away for a moment during the stream. The best tip I can give for this portion is to honestly just tinker around with it. There are tons of options and possibilities you can uncover with a little experimentation.
Then once you have Streamlabs OBS (SLOBS) downloaded and ready to go, I recommend using these widgets:
- Alertbox: This lets you setup the GIF and sound effect that plays when people follow you, subscribe, donate, or do anything else that deserves a mid-stream alert.
- Chatbox: With this you can have chat messages display on-screen wherever you want and in whatever size you want. This is great because not everyone likes to watch with the chat box open natively, so being able to still see comments is great. Plus, if you export your stream or upload it as an archive this ensures all of the chat messages are still there.
- Goal widgets: If you get serious about streaming and want to work toward Follower goals, Subscriber goals, Donation goals, or anything else, then those are good widgets to use too.
Best Settings For Streaming With Streamlabs OBS
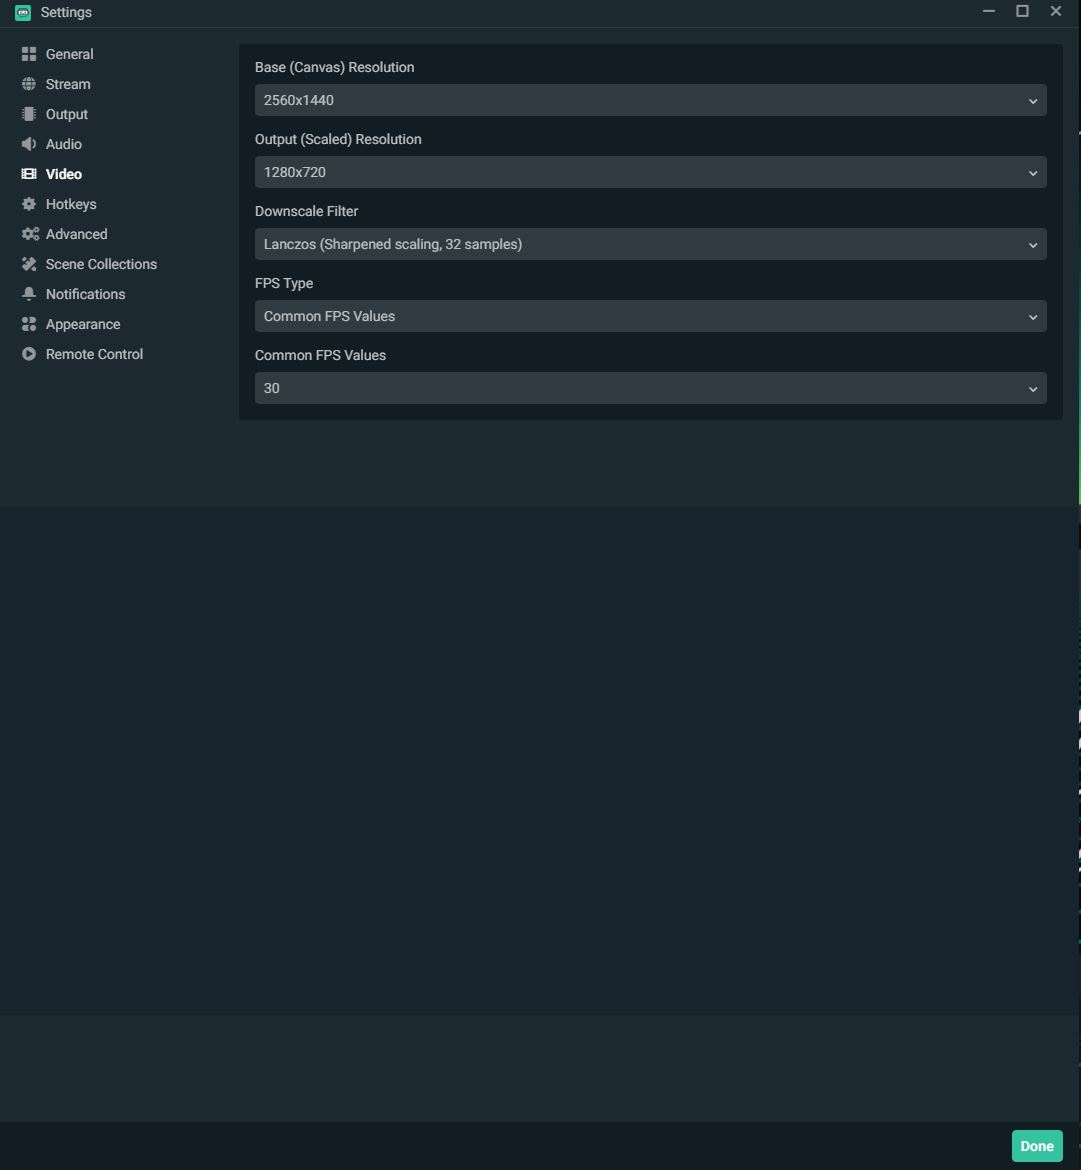
Now we need to cover the actual settings you use in Streamlabs OBS itself. You can see what I use in these two screenshots. Click on them to enlarge and get a better look at the settings:
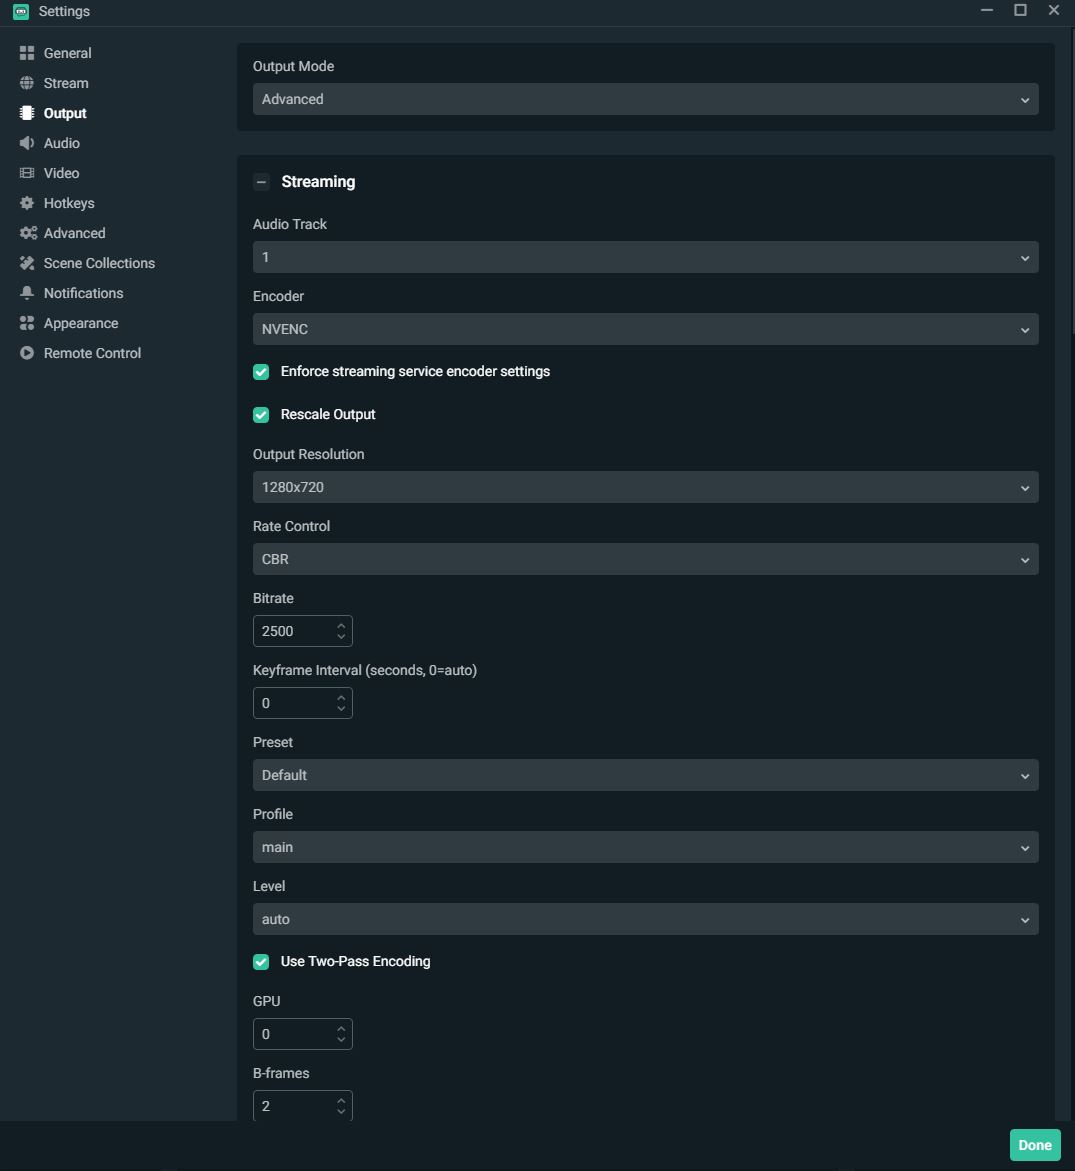
For streaming these are your two most important tabs, after the Stream tab of course (which is where you pick your service like Twitch, Facebook, Restream, etc). On the Output tab you want to make sure the encoder is set to NVENC with rescaled output to 1280×720 — if you have great internet and a really good PC, you might be able to handle going 1080p but it’s usually not worth the performance hit. Set Rate Control to CBR and I use a 2500 Bitrate.
On the Video tab your Base (Canvas) Resolution should match whichever monitor the game window is displayed on. In my case it’s a 1440p monitor. Set the scaled resolution to whatever your rescaled output is, so 720p in my case. I’ve got Downscale Filter set to Lanczos (Sharpened scaling, 32 samples) and the Common FPS Value at 30.
For more detailed advice on what these settings mean there are tons of guides online that cover the under-the-hood implications in more detail. I just wanted to quickly go over everything.
Using a Green Screen
Even if you don’t stream in mixed reality (that’s covered below) you should still be using a green screen during your livestreams, there isn’t really an excuse not to. If you want a compact setup just to cover your standing space, which is good enough for most VR games, I can’t recommend this one from Elgato enough. You can get fancier if you have the space though.
Once you have a green screen it’s really as simple as just going into Streamlabs OBS, right clicking your webcam window, selecting “Filters”, adding a Filter, and picking the “Color Key” option. You’ll need to make sure your lighting is good and that the green screen has a consistent, flat color all the way across.
In my experience the LIV app (explained more below) is also great at keying out your green screen if the Streamlabs OBS option is too finicky for you.
Streaming in Mixed Reality
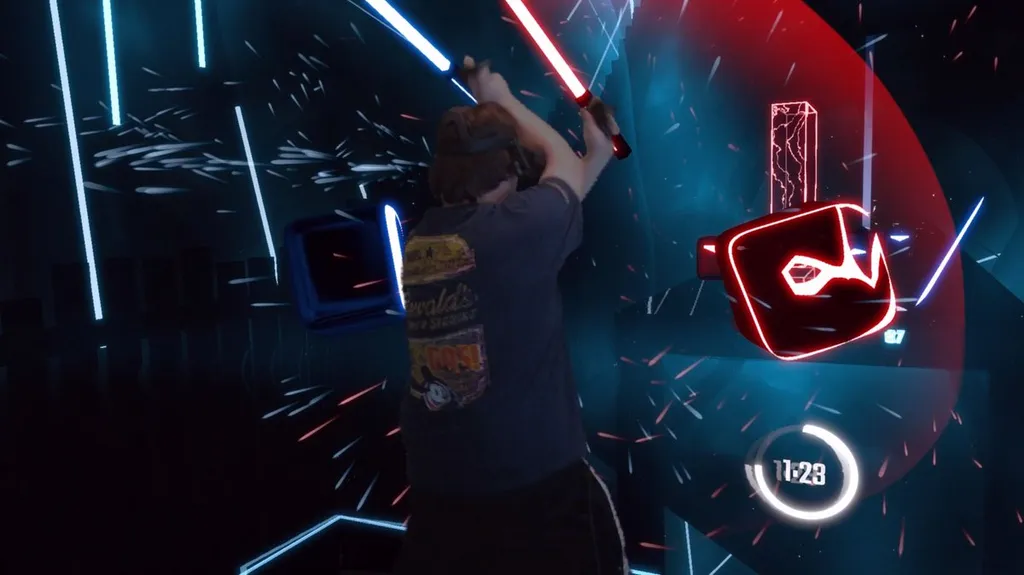
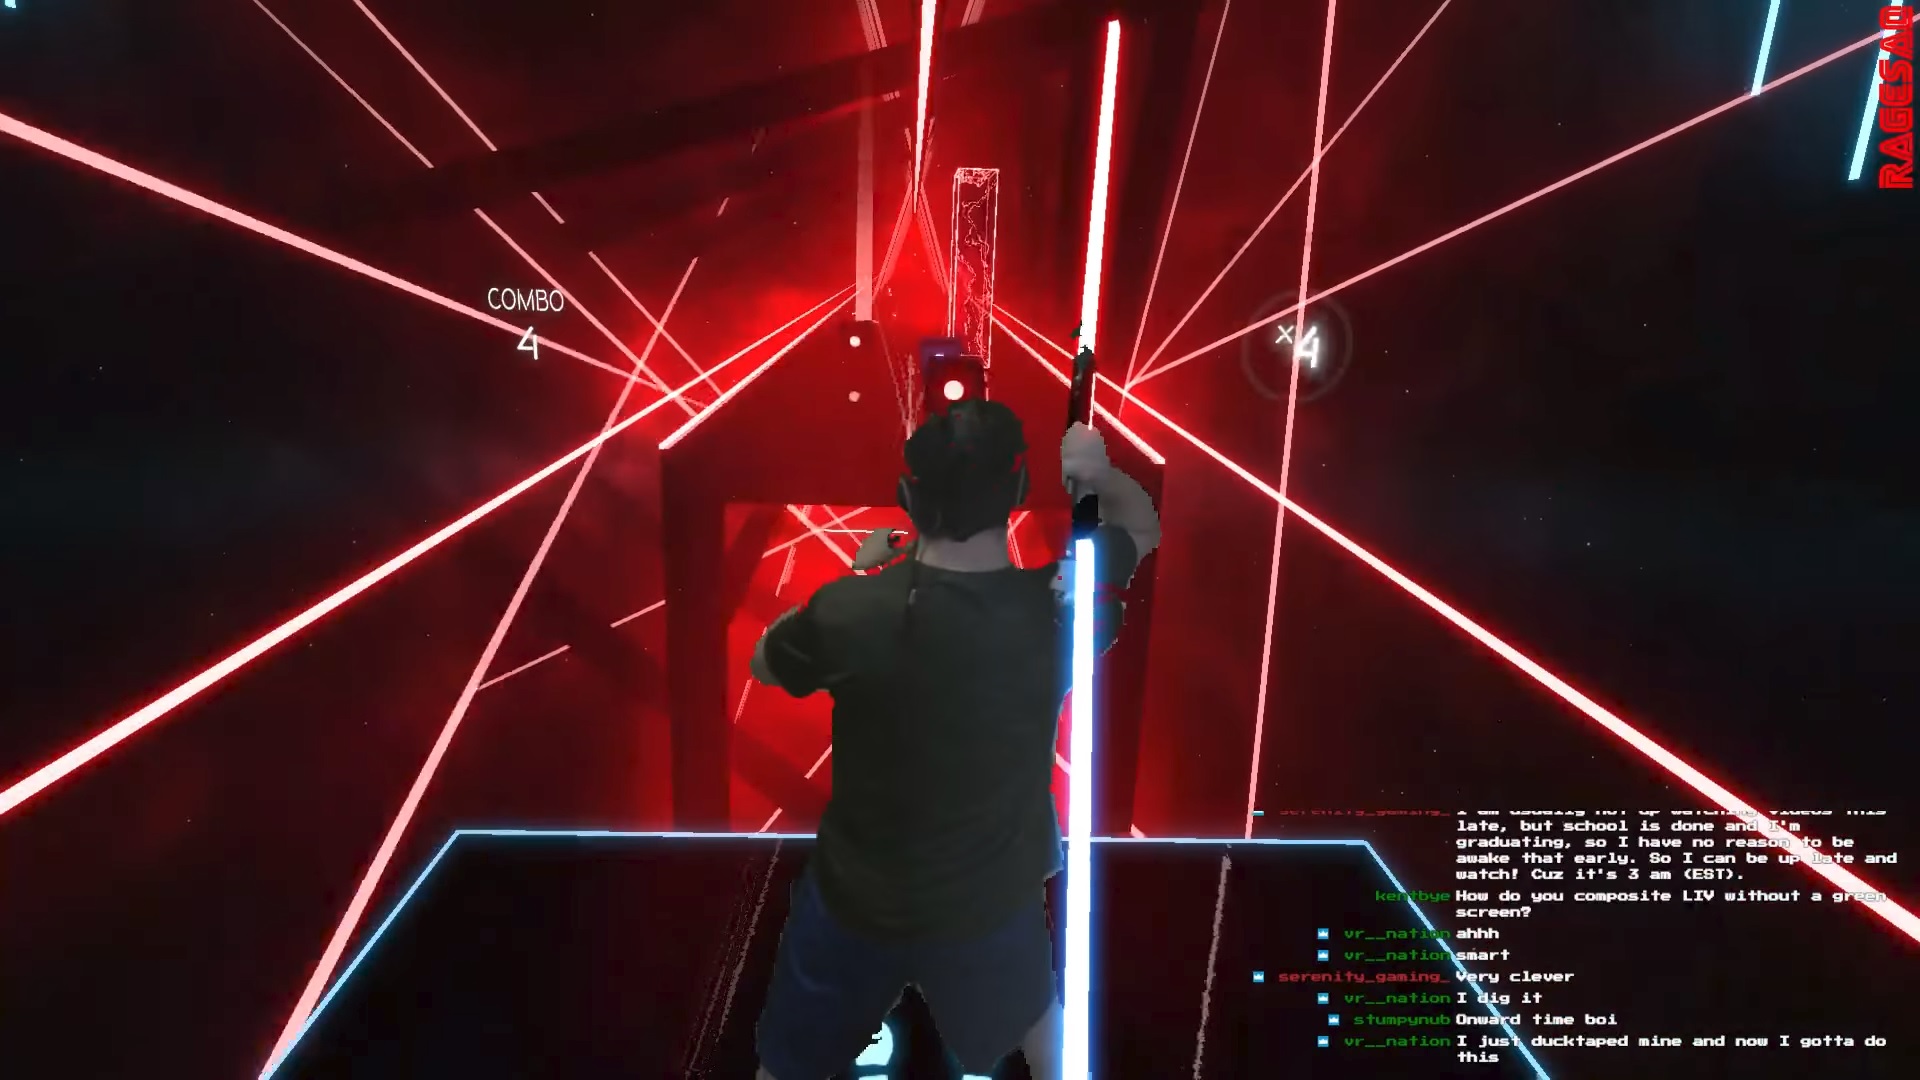
Mixed reality streaming is what allows it to look like you’re inside the VR game while you’re playing it, which can be an incredibly cool and immersive way of watching for your viewers. That’s what I’m doing up in the featured image at the top and you can see a streamer doing it in the image right above this paragraph too. Here’s the latest list of newly added LIV-supported games that will let you stream in that way.
I am not going to try and explain all the steps to get LIV setup with mixed reality streaming because that’s already been done much better elsewhere. You can see the detailed instructions (plus tons of more info) over on the official LIV Wiki site.
The most important thing is that you have patience. It takes a lot of tweaking to get it working right. That and finding the right angle — having a larger green screen area is super important to get the best shot of the action. If you have any questions then you should stop by the LIV Discord channel to ask for help — everyone there is incredibly nice and helpful.
There you go, this should be everything you need to get started! Let me know down in the comments if you have any questions.