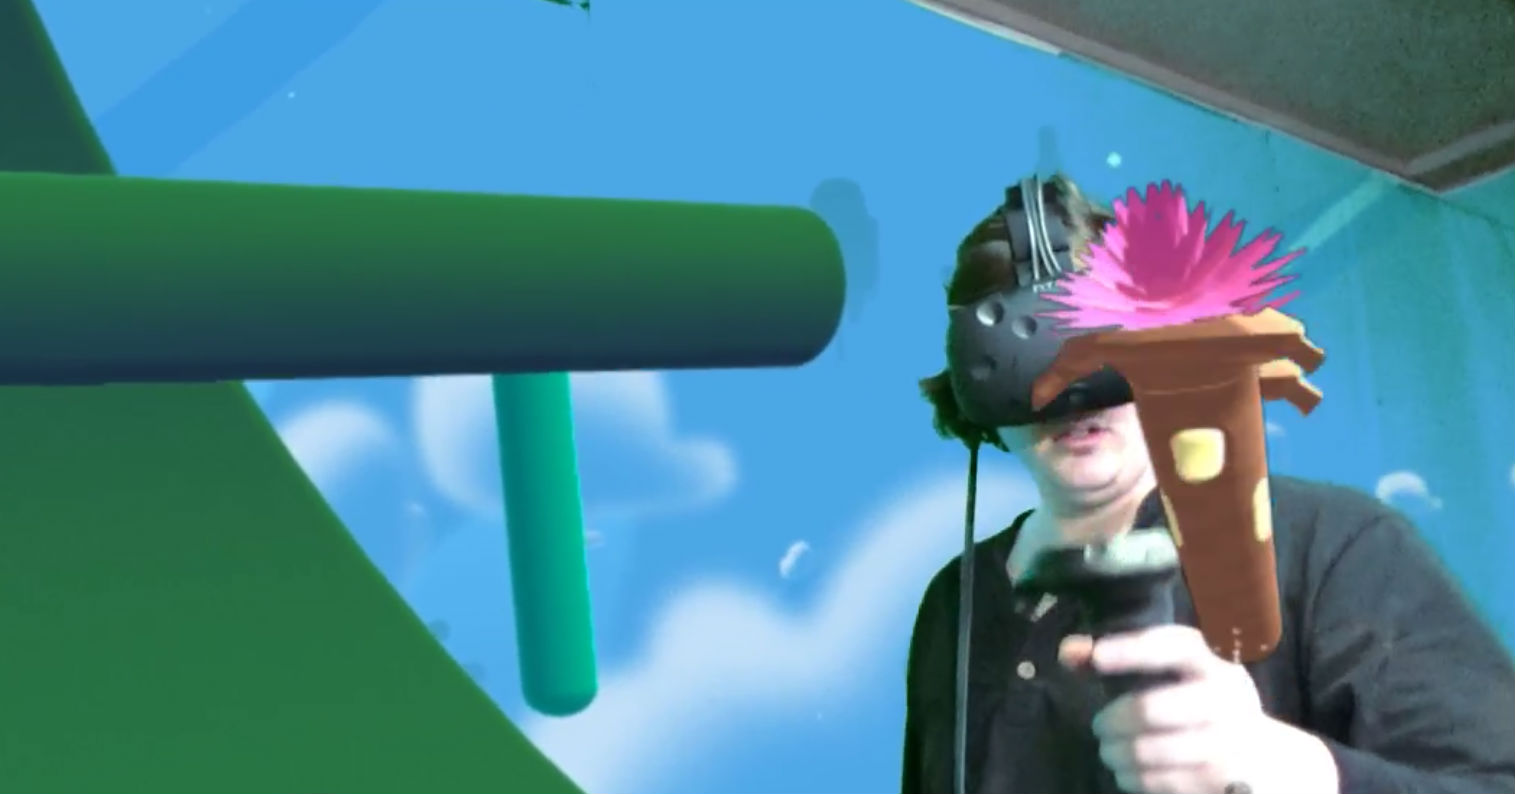
Follow these steps to record or stream mixed reality footage with the HTC Vive
A mixed reality video is one of the coolest ways to show people what a virtual environment feels like. A green screen makes it easy for a VR-ready PC to automatically remove everything from a camera’s feed, except for your body movements. Those movements are then seamlessly combined with a view from another camera in a virtual environment. As long as the two cameras are synced, you can seamlessly combine views of two realities into a single video. In essence, mixed reality capture is doing what Hollywood or your weatherman has been doing for years, except at a fraction of the cost and in real-time.
The end result is almost magical.
We’ve been following the evolution of mixed reality videos closely. Colin and Sarah Northway, as well as their partners at Radial Games, are helping popularize the method of capture while building their puzzle game Fantastic Contraption for the HTC Vive. Valve, creator of the SteamVR software which powers the Vive walk-around VR platform, saw the value in the mixed reality technology and used it to create a Unity plug-in that would allow a lot of developers to activate the feature in other VR games. The Bellevue, Washington-based company ultimately used the approach to create the above mixed reality trailer.
I basically followed instructions outlined by the Northways, and went down their shopping list. In the process, I proved the concept works and that even people with no practical coding experience can do this at home for less than $400. It’s not perfect of course, but it’s good enough that I should be able to show people what VR experiences are like in a much more compelling way than with writing or a traditional video capture. This is my most recent test in Fantastic Contraption using a handheld camera:
Our mixed reality tests are coming along nicely. She was asked to throw things in Fantastic Contraption. pic.twitter.com/AvzWIwglx6
— Upload (@UploadVR) May 2, 2016
Below is our step-by-step-guide to capturing a mixed reality video. The steps are listed roughly in an order to speed your path toward testing and proving you can do it.
Step 1: Mixed Reality Shopping List And Overview
- $188 Sony Handycam
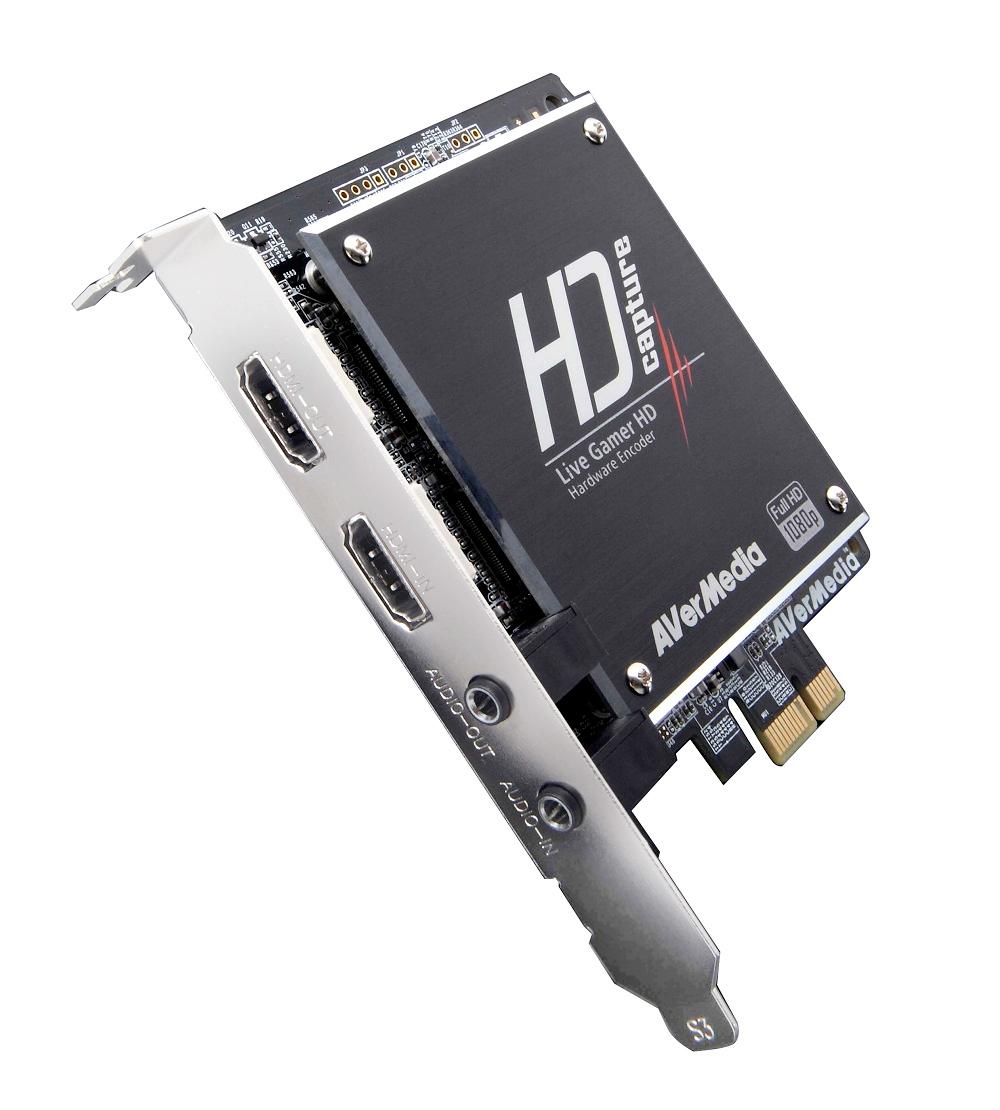
- $160 HDMI Capture Card
- $45 6 ft x 9 ft Green Screen ($15 each, 3X)
- $16 12 ft HDMI Extension Cord
- $6 10 ft USB Extension Cord
The first thing you’ll need is the equipment to capture mixed reality. In addition to the above items, you’ll need a VR-Ready PC and an HTC Vive. Of the above equipment, I bought the Handycam and the HDMI capture card first to simply prove it could work using a $15 green carpet from Home Depot as the backdrop. I bought the green screen and extension cords later after realizing I needed them.
Essentially, the Handycam sends its picture over the HDMI extension cord to the HDMI capture card, which is mounted inside your PC. The camera gets its power over the USB extension cord, which is plugged into a USB charger instead of the PC. From the capture card, the picture feeds into free software called OBS. You’ll want to download the Studio version of Open Broadcaster Software here.
Step 2: Install Capture Card
While step 6 below is probably the hardest part of the whole process, installing the capture card might be the most stressful. It likely requires removing a piece on the back of your PC case to make room for the HDMI input/output of the card, which mounts to an open PCIe slot on your motherboard. I found it to be a very tight fit.
Follow the instructions that came with the card to ensure it is installed properly and ready to receive a signal from your camera.
Step 3: Connect Camera
The HDMI-in port on the capture card can now be connected to the HDMI-out port on your camera. You’ll need lengthier extension cords than the ones in the shopping list above if you want freedom to move the camera around the room without getting tangled with the Vive cords. Two 15 foot USB extensions and a 15 foot HDMI extension are needed to cover the same distance with your camera as is possible with the Vive headset, and they’ll need to be longer if you want the camera person to stay around the perimeter of the room with all those extra cords.
Note: The camera I purchased has a finicky HDMI port. A connected cord needs to be carefully positioned for it to send a signal to the PC. I’m not sure if this is unique to my unit and a result of leaving it connected 24/7, but I figured it was worth mentioning.
Step 4: Set Up The Game
While a number of games seem to be integrating with mixed reality, Fantastic Contraption is the first for the HTC Vive and the only one so far that we’ve properly tested at UploadVR. I highly recommend you follow the instructions by Colin Northway for setting up their game and OBS for mixed reality.
Read More: Northway Games Mixed Reality Instructions And Settings
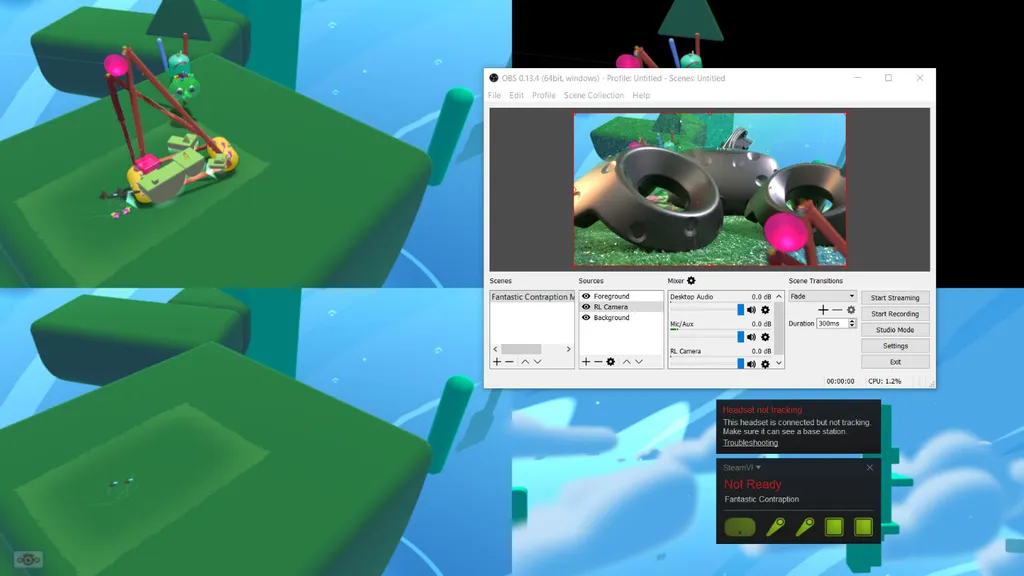
In brief, activating a special setting inside Fantastic Contraption will show four simultaneous camera views into the virtual world. One quadrant shows stuff in front of the headset and another shows stuff behind the headset. The real-life camera you hooked up in step 3 provides a third view. These three layers — VR foreground, real-life camera and VR background — are sandwiched together in real-time by OBS. You’ll set that up in the next step.
For now, you hold down the “shift” key while opening the game to make sure it’s full screen at your monitor’s resolution. Hit the eye button in the corner of the window to bring up a menu and hit “Settings” to turn on “Toggle Depth Camera” with a “Foreground Colour Key” set to: (0.0, 0.0, 0.0).
Step 5: Set Up OBS
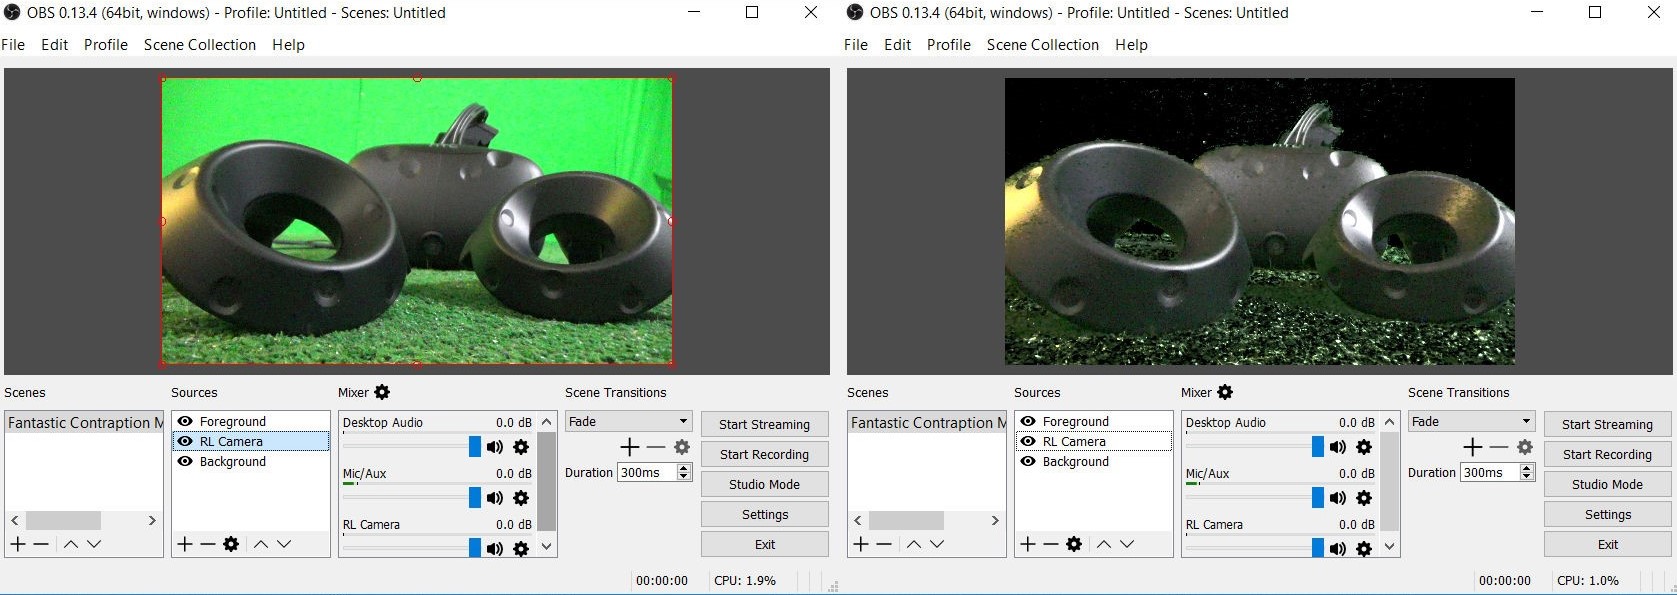
The instructions posted by Colin Northway were open on several of my devices while I tried setting up the broadcasting software. I believe he has a higher resolution monitor than me, so every time I referenced his instructions I needed to use different numbers for my monitor. Assuming you have a 1080P monitor, the below settings should get you ready for mixed reality capture in the studio version of OBS:
- For the “Background” layer set as a “Window Capture” of “Fantastic Contraption” with cursor capture off. Place a “Crop” filter on the layer set to 960 on the “Right” and 540 on the “Bottom”.
- For the “RL Camera” camera layer set as a “Video Capture Device” and place a “Color Key” filter on the layer. Adjust “Similarity” and “Smoothness” to remove green background but not the person in the front.
- For the “Foreground” layer set as a “Game Capture” and unselect “Capture Any Foreground Application” with “Fantastic Contraption” selected in the dropdown. Make sure “Allow Transparency” is checked while “Capture Cursor” is not. Place a “Crop” filter on the layer. Set to 960 on the “Left” and 540 on the “Bottom”.
- Note: Resize each layer to fill the area by clicking and dragging one of the little red circles framing the layer.
Step 6: Sync Camera
Right now you can use a stationary camera or a moving camera to film a mixed reality video.
A stationary set up requires carefully positioning a virtual camera to be in the exact same position and orientation as the real-world camera. It can be a real pain to do with a keyboard and you’ll likely need a friend to help. You move the virtual camera around with the WASD keys. Q moves up. E moves down. The arrow keys point the camera in different directions. You’ll also have to adjust the FOV of the virtual camera in Fantastic Contraption’s settings to match the real-world one as well.
Does that look good? Mixed Reality Test #4 pic.twitter.com/rupsK0bd9C
— Ian Hamilton (@hmltn) April 8, 2016
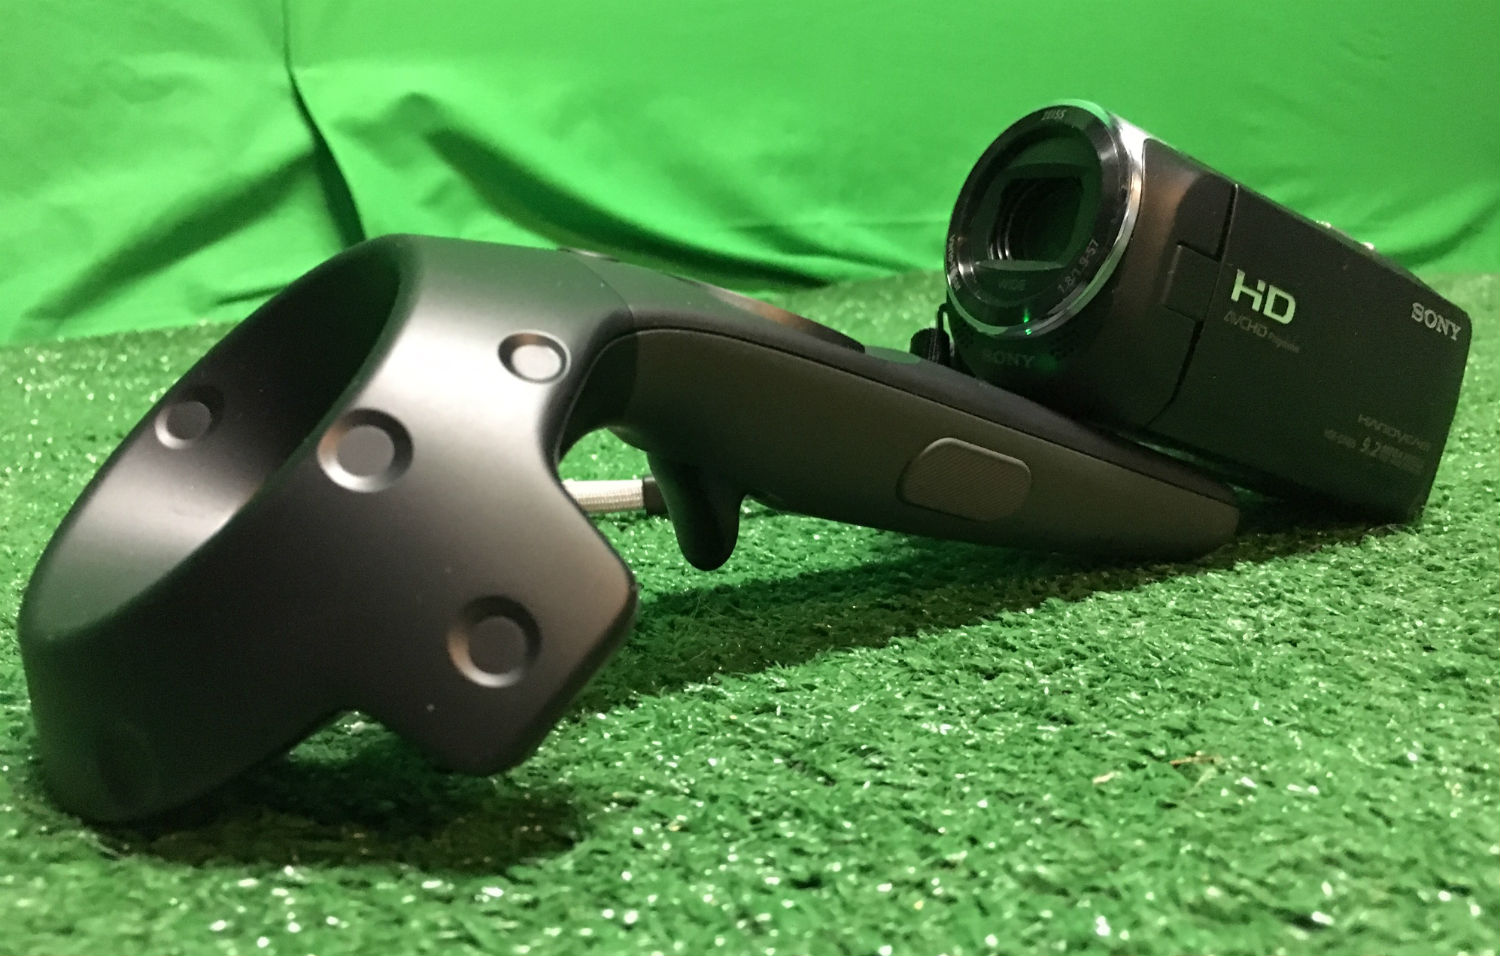
A moving camera produces a far more compelling mixed reality video though. Doing this involves holding, or strapping, a Vive controller tightly to the camera. The video won’t look right if the HDMI cord comes out while you’re moving or the camera and controller fall out of alignment. You’ll also have to interact with Fantastic Contraption using a single controller unless you have a third one around, and can figure out a way to connect it to the system alongside the other two. I have the luck of having access to a third controller so I briefly experimented with plugging it in to the PC while the other two connected wirelessly to the Vive headset. I don’t currently have a second USB cord long enough to make that feasible for capture though.
Step 7: Set Up Studio
I left this step for last because, once you prove it can work following the above steps, arranging your studio becomes a balance of cost against convenience. I have a dedicated VR room, for example, so nailing a green screen to the wall wasn’t a big deal. That won’t work for everyone and temporary stands to hold the green screen up are an option as well.
You’ll also want bright lighting. The brighter the better. Originally, I bought green carpet that was a significantly darker shade of green than the screen on the wall. It helped me prove my mixed reality streaming works in theory but my system struggles removing both shades of green at the same time. If I had proper lighting I might be able to adjust the OBS settings enough to remove both.
Step 8: Record Now Or Set Up Twitch
Simply hit “start recording” to capture your mixed reality footage or use your Twitch account to stream from inside OBS.
Next Steps
First of all I need to find more games with these mixed reality features so I can film a variety of experiences this way. UploadVR is reaching out to developers, but if you know of any apps with mixed reality features, and how to activate them, please email ian@uploadvr.com.
My capture system could be improved with the addition of a stabilization rig that would erase my shaky hand, which was holding a Vive controller tightly pressed underneath the camera. My setup could also use more lights so shadows aren’t cast on the screen and I’ll need to explore other ways of mounting the green screen to the wall other than nailing it in.
Stay tuned to UploadVR and our YouTube Channel for more mixed reality videos in the future.
Further Reading: Kert Gartner Explains How He Makes Mixed Reality Trailers
Side Note: Magic Leap and Microsoft’s HoloLens adopted the term “mixed reality” to describe the way those technologies seamlessly insert virtual or holographic objects into a view of the real world. Essentially, those companies are using the term to mean “augmented reality on steroids.” When it comes to VR, a mixed reality video can be used to seamlessly show what people are doing inside a virtual world.

