Looking to install Quest 2 content that’s not available on the official Quest Store and isn’t pre-approved by Meta? Here’s our guide to sideloading content on Oculus Quest, Meta Quest 2, Quest Pro and Quest 3 using SideQuest.
How to Sideload on Oculus Quest, Meta Quest 2, Quest Pro & Quest 3
While Meta (formerly known as Facebook) enforces a strict console-like curation policy for the games and apps it makes searchable or promotes on the Quest storefront — and that policy has resulted in strong sales for some developers — there’s still a lot to see and do in VR beyond what Meta staffers pick as likely to succeed on its store.

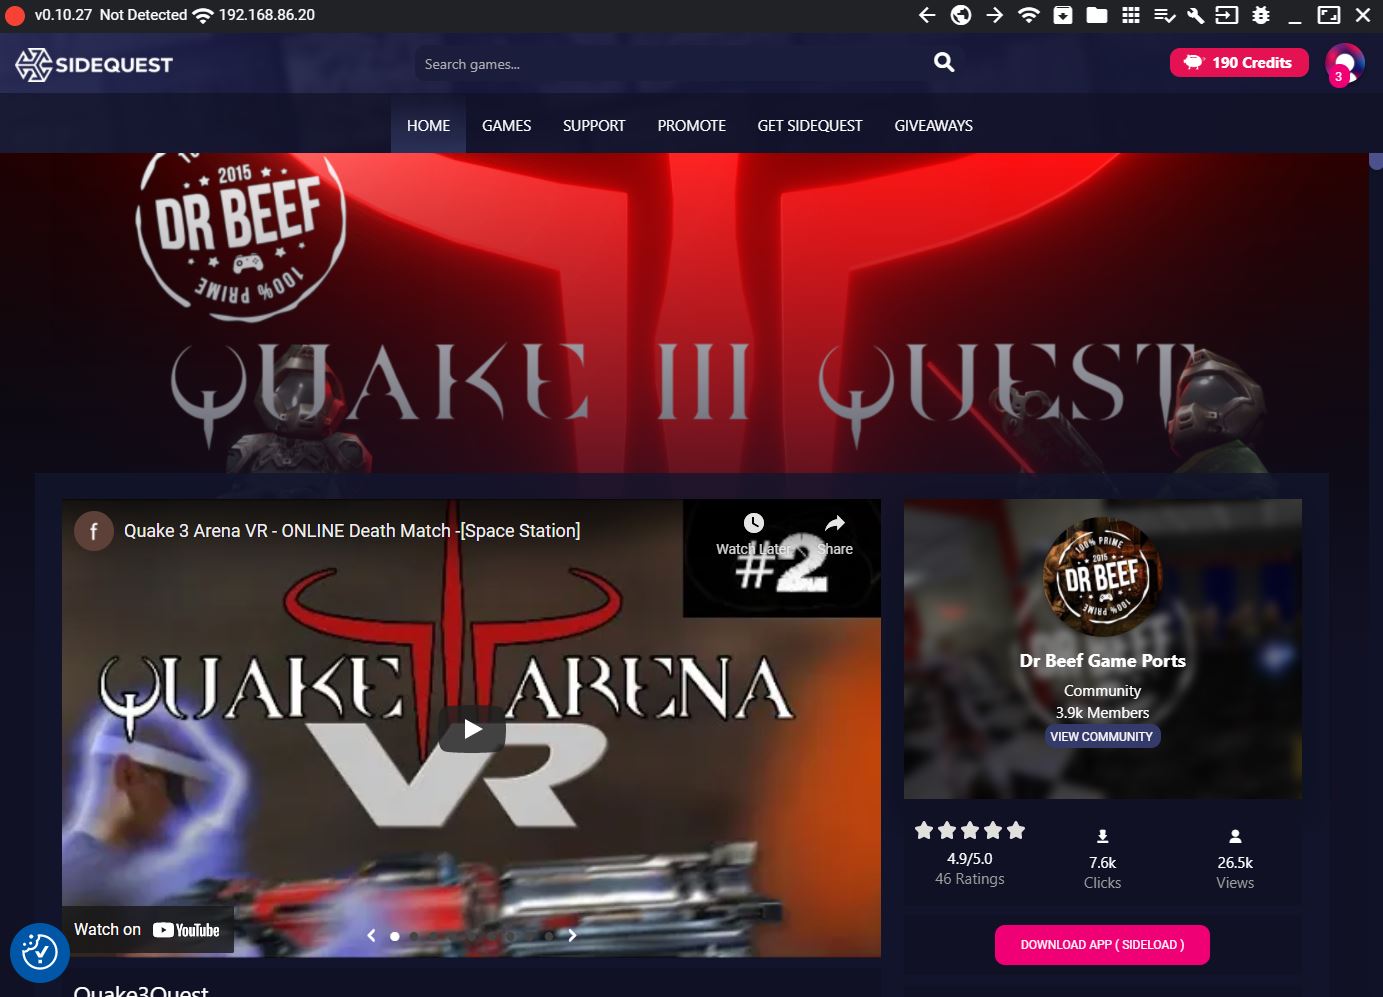
Classic games from the 1990s including Doom (1993), Doom 2 (1994), Quake (1996), Quake 2 (1997), Half-Life (1998), Quake 3 Arena (1999), and even 2004’s Doom 3 are playable in fully immersive standalone VR on Quest 2 using sideloaded fan-made ports. You can also stream PC VR content from the cloud via apps like Plutosphere, or install custom home environments on your Quest to replace Meta’s default options.
Put simply, sideloading is how you can run content on Quest that’s not listed or even vetted by Meta. There’s some setup involved and caveats to consider, but overall sideloading can make it possible for Quest 2 owners to go beyond what’s available officially for download from Meta’s servers.
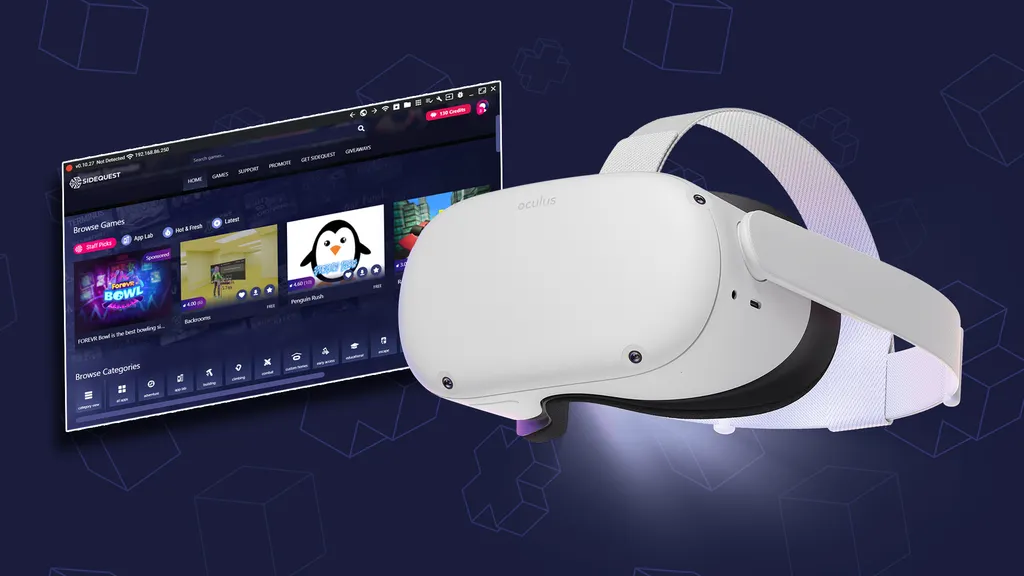
For years now, we’ve found SideQuest to be the easiest way to put this content on the Quest 2, Quest Pro, the original Oculus Quest and Quest 3, while past updates have made the software even more powerful.
What is sideloading?
‘Sideloading’ is a term applied to content loaded onto modern computers from sources not explicitly approved by content reviewers. It can sound scary, and while you should take care when sideloading, the term also applies to everyday tech situations. For example, downloading an unverified program from a site on the internet and installing it on Windows is technically sideloading.
Proceed with caution, then, but it’s not always as scary as it sounds. For Meta Quest VR headsets, sideloading refers to the process of loading content onto the device that is not approved or verified by Meta and does not appear on the official store for Quest.
Why, and what, would I sideload?
If the Quest has a lot of high-quality optimized content in the store, why would you ever put anything else, or need anything else, on the device? Sideloading allows users to do things you can’t do normally on the device, or can’t find in the Oculus Store, such as:
- Install pre-release builds released by a developer, before the game is finished and/or released.
- Install apps and files that are not available on the Oculus Store or through App Lab (either because they were rejected or have not yet applied for a listing).
- Use an alternate build of an approved Oculus Store application – alternate builds might offer additional content when sideloaded, which isn’t approved under the store guidelines.
- Load custom content – certain games and apps may support the ability to access content you’ve stored on the device, like a folder of audio files you could listen to while playing a VR game.
- Install tools that offer new insight into how you’re using your Quest.
If you’re wondering where to start, here’s a list of some of the best content available to sideload onto Quest.

App Lab vs SideQuest
When the Quest first released, the only way to install non-Store content onto the device was through sideloading. This remained the case up until February 2021 when Oculus launched App Lab. App Lab is essentially Meta’s system for developers to offer content on Quest without it being listed on the Oculus Store.
Developers still need to submit applications for approval onto App Lab — while curation is not nearly as strict as the Oculus Store, not everything will make it to App Lab. As a user, there’s also no way to browse the full selection of App Lab apps on offer — instead, developers can send users unlisted app links, from which they can add the content to their Quest library.
This is where SideQuest comes in. SideQuest essentially offers a database of non-Store content for Quest — it collates App Lab and other non-Store content alike into one place, presented as one big library for easy discovery. Put another way, SideQuest is the easiest place to browse, install and manage anything on the Quest beyond the officially-listed store content.
How do I sideload?
Technically it’s possible to sideload content onto a Quest just using ADB (Android Debug Bridge) commands from your PC, but for most people, SideQuest is the much easier option. It is an all-in-one application available on multiple platforms that makes discovering and sideloading content a fairly easy process.
It was originally only available for PC, Mac and Linux, but there’s now an Android app for mobile and even an ‘Easy Installer’ version available as a VR app that can be installed and used on your Quest headset directly.
First Time Setup: Getting everything ready
The following first-time setup steps are necessary in order to sideload any content onto your Quest, no matter which method or version of SideQuest you use.
Make sure you have a USB cord to connect your Quest to your computer/phone.
If your computer has a USB-C port, you can use the charging cord that ships included with your Quest.
If not, you could use a USB C to A cord (which you might already own) or a USB C to A adapter with the Quest’s included cable.
If you plan on using your Android phone, you’ll need USB C on one end and whatever port your phone uses on the other.
Register as a developer on the Oculus/Facebook account associated with your Quest.
In order to use your Quest in Developer Mode (which is required for sideloading), you’ll need to register as a developer organization first.
Visit this page and make sure you’re logged into the same Oculus/Facebook account that your Quest is registered to. Enter a new organization name and tick the ‘I understand’ box to agree to the Oculus Terms of Service.
Enable Developer Mode on your Quest.
Once registered, you can enable Developer Mode on your Quest through the Meta Quest mobile app (formerly known as the Oculus app) on your phone.
In the Meta Quest mobile app:
1. Locate your Quest headset in the app, either through the default home page or by going to the Settings tab, then clicking on the Devices button.
2. With the headset page open, make sure it reads ‘Connected. (If the app can’t connect to your Quest, make sure your Quest is turned on, and your phone has Bluetooth and WiFi turned on as well)
3. Scroll down to the Headset Settings section.
4. Tap on ‘Developer Mode’
6. Flick the switch to On instead of Off
7. Fully reboot your Quest – hold down the power button on the side and select ‘Power Off’ or ‘Restart’
After rebooting, your Quest should be in Developer Mode.
Which Version of SideQuest?
The ‘Easy Installer’ VR version of SideQuest, installable directly on your headset, is the easiest way to browse, download and install non-Store and App Lab content directly on your Quest.
The VR app is technically a stripped back version of the original PC app, but offers all the functionality you need for installing content and sideloading most apps. It also allows you to browse some App Lab content through the app, and install it directly on your headset without leaving VR. This is the simplest, most convenient option and what we recommend for most users.
The original SideQuest application on PC, Mac and Linux offers the most functionality, but requires your Quest to be connected to your computer.
This version of the app has additional functionality that other version do not have, like tweaking hidden headset settings. For most people, this shouldn’t matter and isn’t necessary.
SideQuest for Android covers the basics of browsing and installing SideQuest store content onto your Quest from your phone.
It needs a wired connection via USB between your headset and phone. Like the VR app, the Android release doesn’t have the same exact feature set as PC/Mac/Linux.
‘Easy Installer’ – SideQuest for VR on Quest
This ‘Easy Installer’ release (which is still in beta) allows you to install SideQuest directly on your Oculus Quest or Meta Quest 2 headset.
Make sure you’ve completed the First Time Setup steps above.
Download SideQuest Easy Installer
Go to the SideQuest downloads page and download the appropriate Easy Installer release for your system (PC, Mac or Linux).
Open Easy Installer and connect your Quest
Connect your Quest via USB and make sure it’s turned on. Open up Easy Installer.
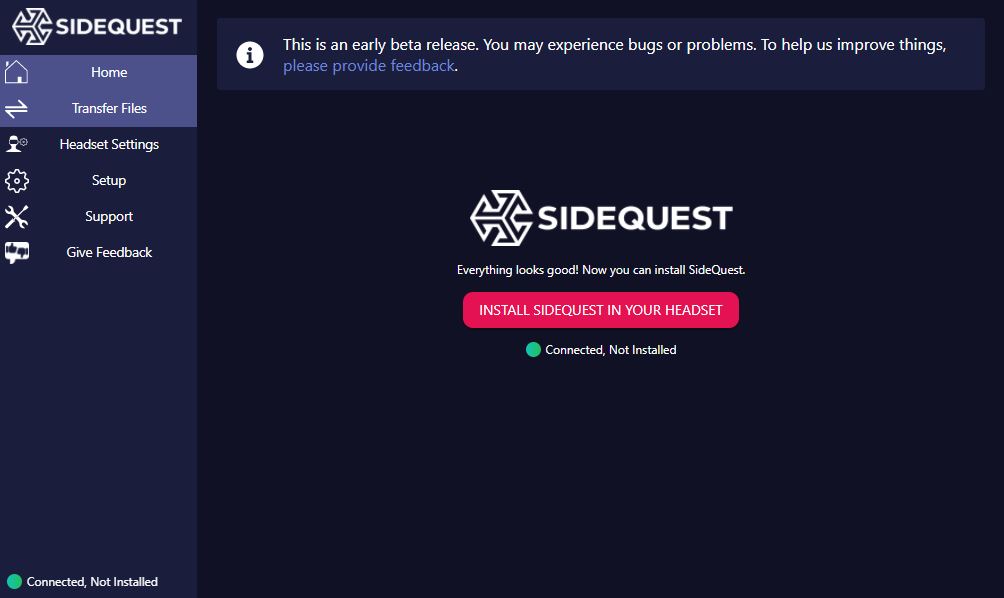
When you open up the Easy Installer, it should automatically come up with a button to ‘Install SideQuest In Your Headset’ (pictured above).
If your headset isn’t detected, you may not have completed the First Time Setup steps above properly. Try running through those again (you can also press the ‘Open Setup Instructions’ button in the Easy Installer for visual instructions on the process).
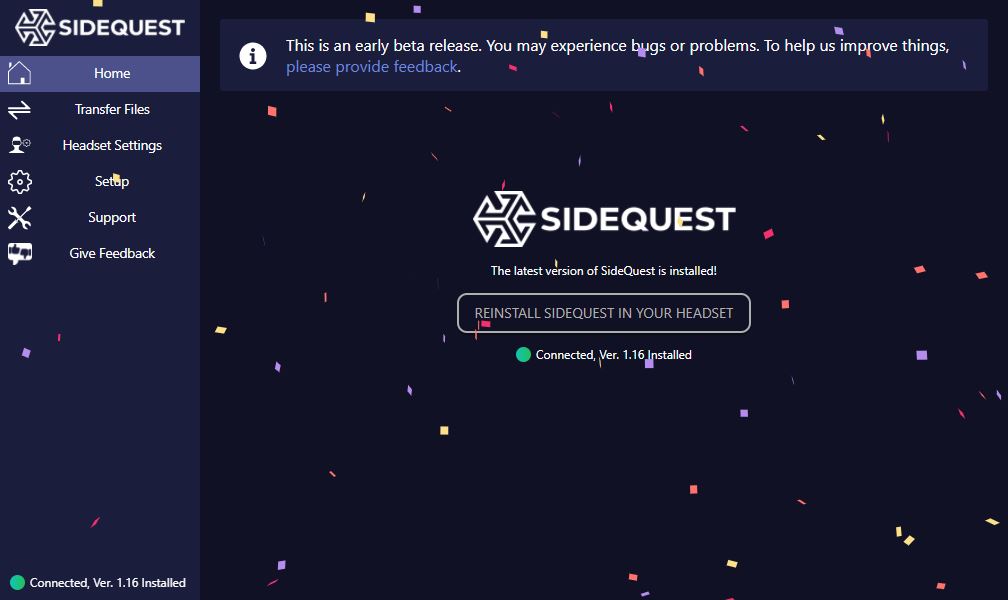
Once finished installed, Easy Installer will spray confetti over the window and indicate the process has finished (pictured above). You can unplug your Quest.
Opening and linking SideQuest on your Quest
After installing SideQuest, you can find it in the ‘Unknown Sources’ tab of your Quest App Library.

You can find this by opening your App Library, then clicking on the tab in the top right-hand side.
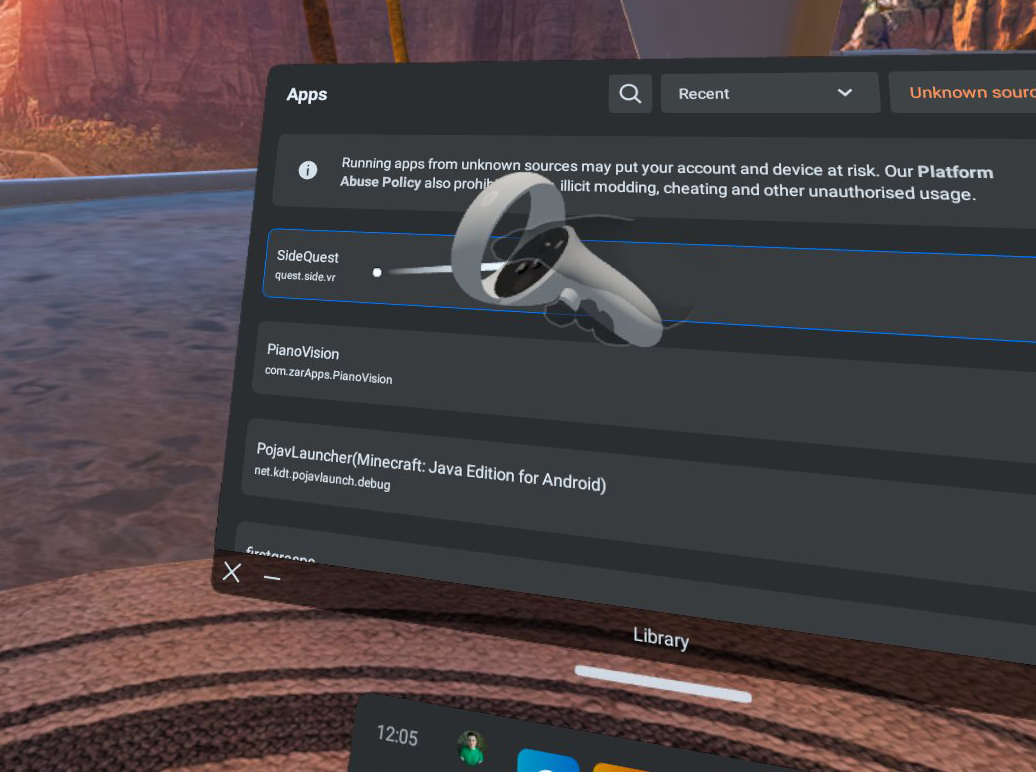
In Unknown Sources, you’ll be able to open SideQuest.
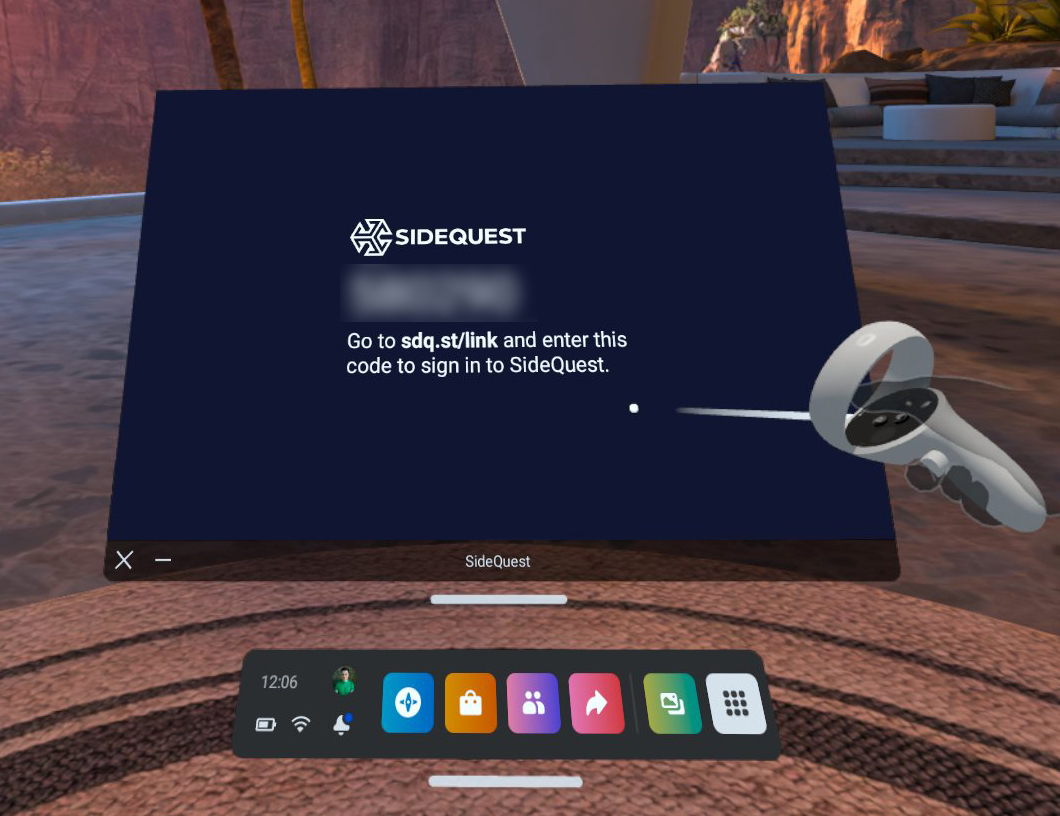
SideQuest will present you with a linking code. Using a computer, phone or Meta Browser, head over to sdq.st/link, login to SideQuest (if you haven’t already made a SideQuest account, you will need to do so now) and enter your headset’s unique 6-digit code.
The browser window will bring up a dialog box confirming you want to link your headset — click on the link button in the bottom right.
Installing and Opening Content via SideQuest
After linking your account, you’ll be able to browse and install SideQuest content from your headset without using a computer at all. Conveniently, the SideQuest Easy Installer also lists some App Lab content as well, which can also be installed from within your headset.
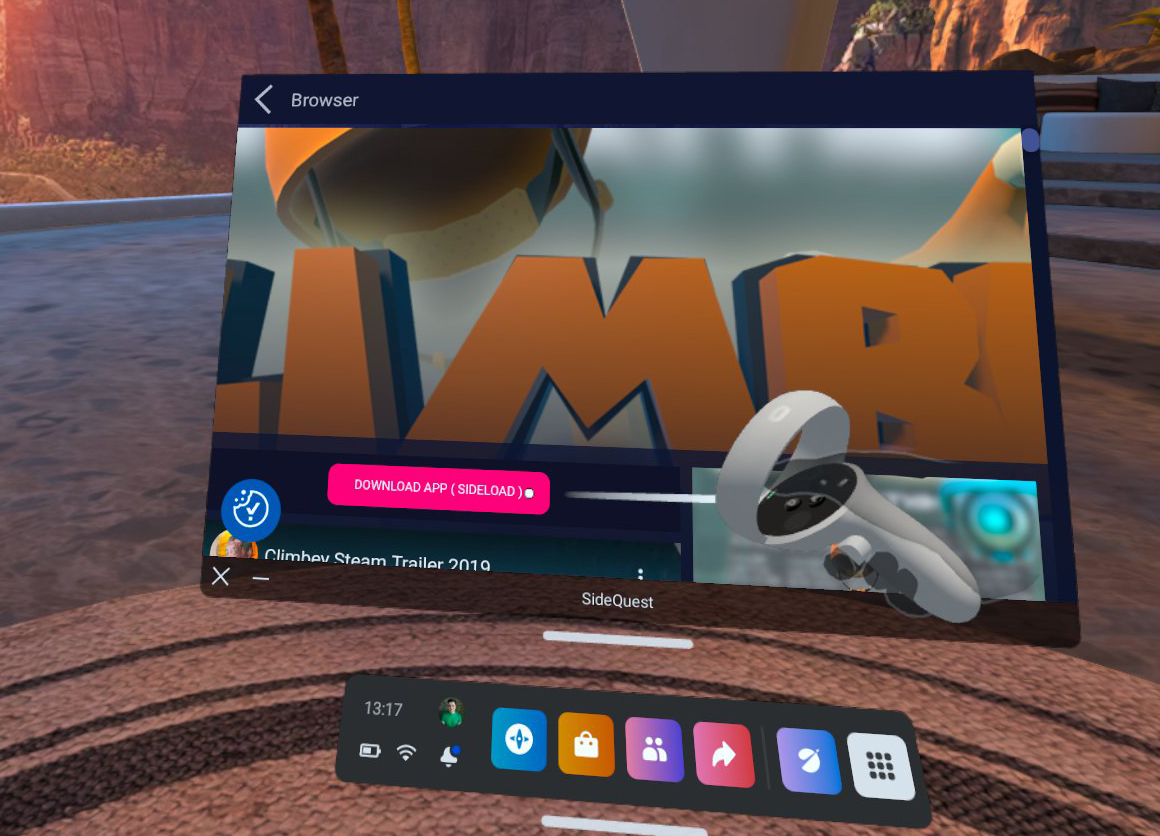
To install an app, open up its listing page and click on the pink button. This will either read:
- ‘Install App (Sideload)’ — For SideQuest store content (pictured above)
- ‘Install App (Oculus)’ — For App Lab content
For the former, the app will download in SideQuest and then you will receive a prompt asking if you want to install. Hit the install button. After that, you can open the app from the Unknown Sources tab in your App Library.
Note: The first time you do this, you may get an additional prompt about installing unknown apps — click on the settings button on the prompt, then flick the switch to give SideQuest permission to install apps on your Quest. Then head back to the app and try again.
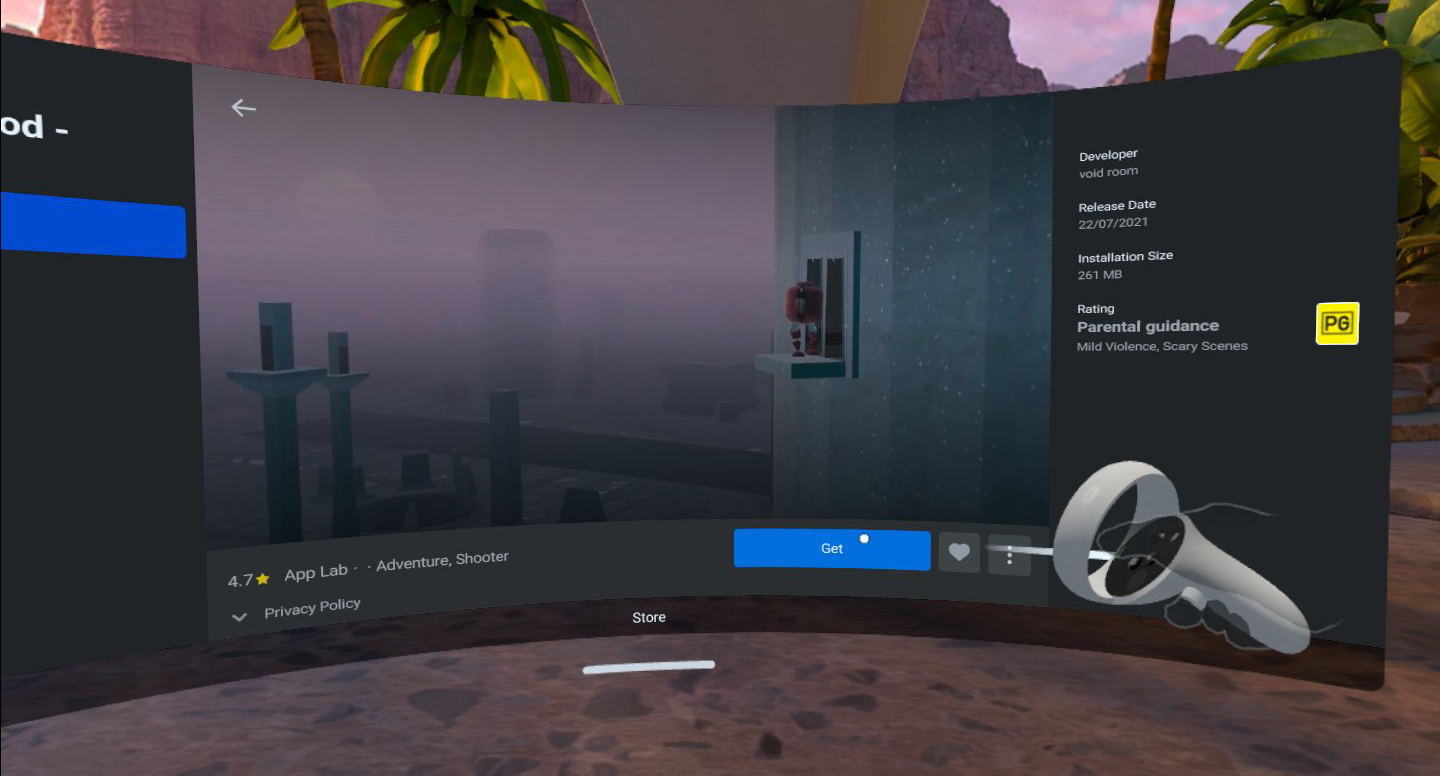
For the latter, hitting the button will open a browser window, which will then redirect to an Oculus Store-like page for the App Lab app. Hit the blue ‘Get’ button (pictured above) — the app will download and install on your headset. You’ll be able to find it in your App Library, alongside other Oculus Store apps.
SideQuest for PC/Mac/Linux
Install SideQuest on your computer
Go to the SideQuest downloads page, download and run the ‘Advanced Installer’ for your Desktop operating system, which will install SideQuest and the necessary drivers for sideloading.
Allow USB debugging between your computer and your Quest
After opening SideQuest and connecting your Quest to your computer, a prompt to “Allow USB debugging” will show up inside your headset. Click OK and tick ‘Always allow’ to ensure you don’t have to repeat this step in the future.
Sideloading Apps and Games via PC/Mac/Linux
Before sideloading, check SideQuest can connect to your Quest — the top left should show a green dot, pictured below.

If your Quest is connected via USB but SideQuest is showing a red dot, double check that your Quest is on, connected properly and you followed the USB debugging steps correctly.
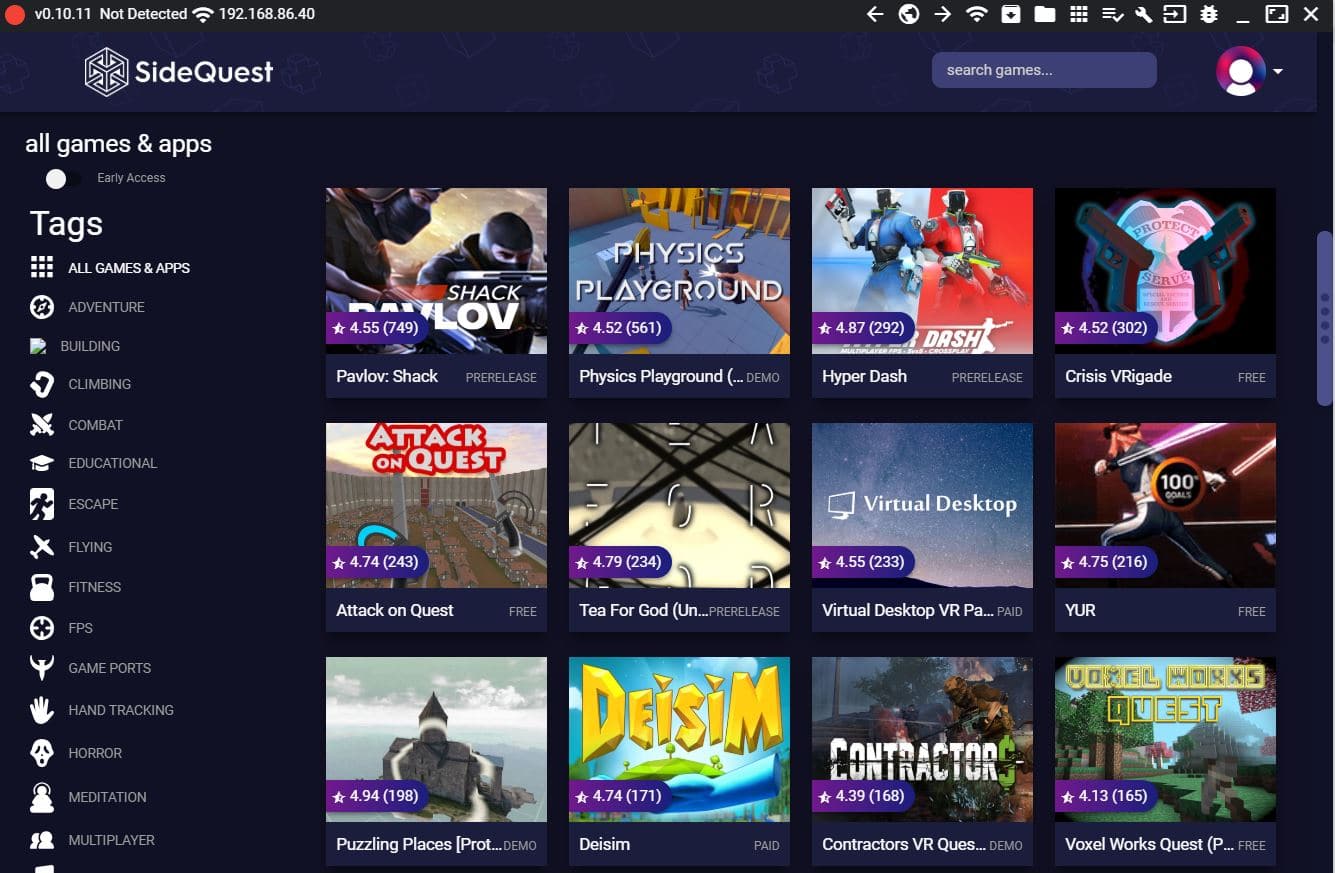
Once connected, you can browse all the available content from the SideQuest home page, pictured above. Once you find an app to install, click on the app to bring up its listing page.
Every game will have a pink install button, with ‘Download App (Oculus)’ for App Lab content and ‘Download App (Sideload)’ all other content, pictured below.
App Lab content won’t actually install through SideQuest — it will just redirect to an App Lab page where you can add the game to your Quest’s library.
All other sideloaded content will install via SideQuest — you can click on the ‘Tasks’ button on the top right (circled in red below) to check progress. If the app was downloaded and installed correctly, you will see a bar reading “APK file installed ok!!” (also pictured below).
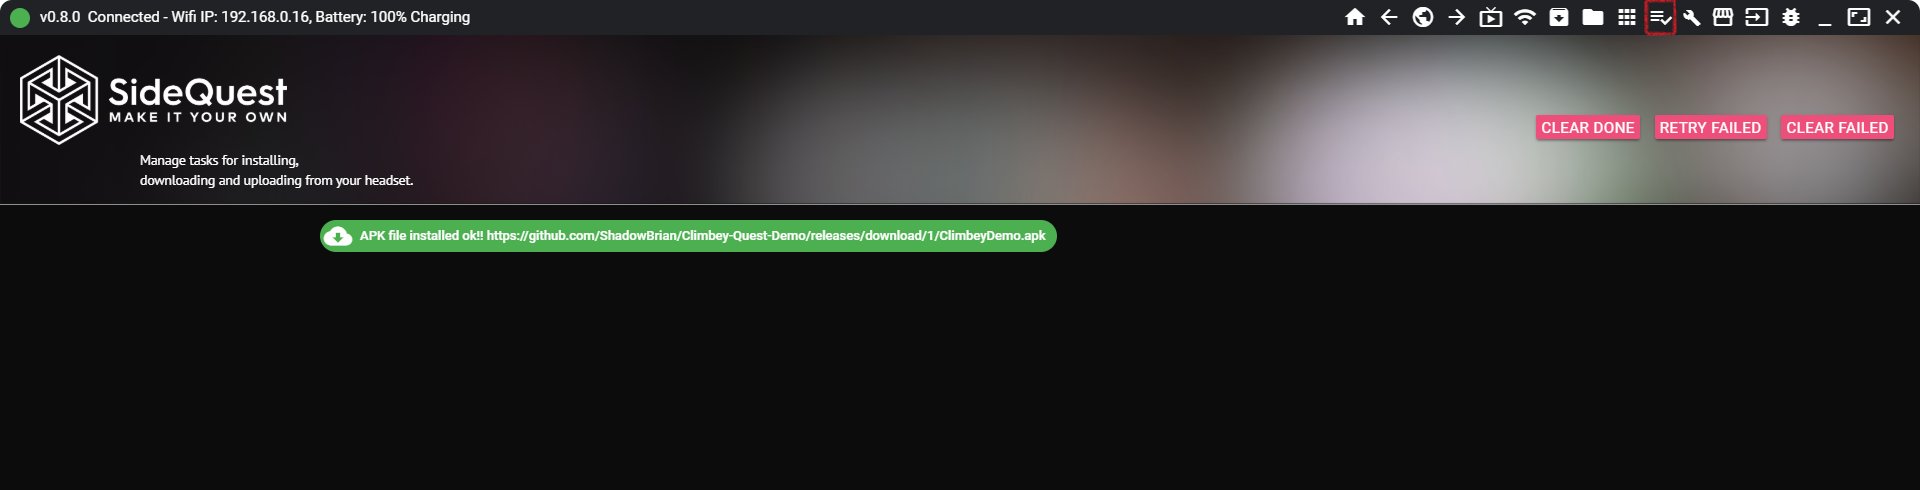
And that’s all there is to it! You’ve successfully sideloaded an app from the SideQuest store.
Sideloading an .apk from an external source
You might also find Quest apps online, which developers make available as an APK (.apk) file. To sideload these, all you need to do is click on the ‘install APK file from folder’ button (see below, circled in red).

This will allow you to locate and select the APK file, which SideQuest will then install. You can check the install is successful in the ‘Tasks’ tab, as described above.
SideQuest for Android Phones
In April 2021, SideQuest launched an Android app that allows you to sideload apps using your phone instead of a computer. It’s Android only for now — there’s no iOS support yet.
Installation
The SideQuest app is available to download on the Google Play Store. Install the app on your Android device of choice.
Connect your phone to your Quest via USB and click OK on the ‘Allow USB Debugging’ prompt in your headset.
Once that’s done, open SideQuest for Android.

The SideQuest logo in the middle of the toolbar should have a green dot if everything is connected properly, pictured above. If not, try unplugging and replugging your Quest and/or repeating the steps above if necessary.
Sideloading Apps and Games (Android)
In the SideQuest app, you can browse and search all of the available content from the app’s homepage.
Once you’ve found something you want to install, open up that app’s listing page, pictured below.
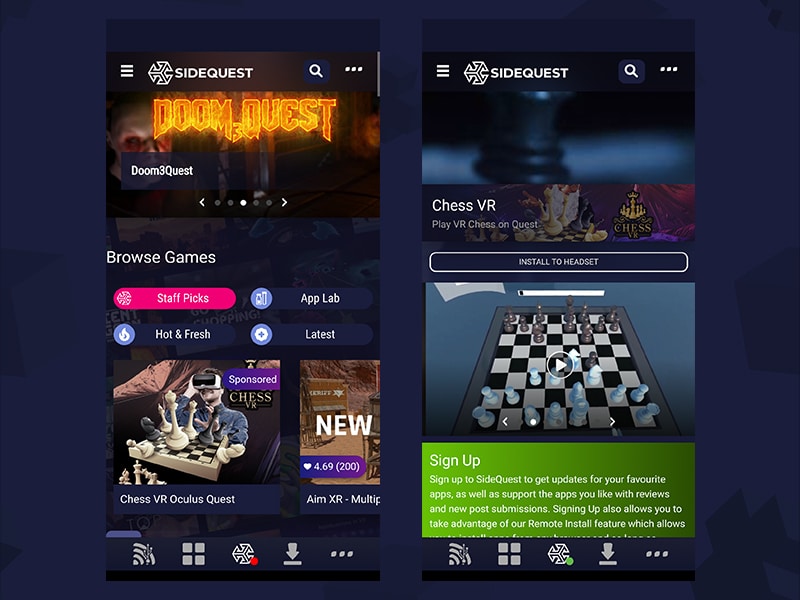
To install the app, click the “Install to Headset” button.
The app will begin downloading and then installing — you can check the progress in the downloads tab on the app’s toolbar.
Once the install is finished, the progress bar will read ‘Success’.
Alternate Method: Wireless Android Sideloading
It’s also possible to set up wireless sideloading using the Android app, by enabling wireless ADB. Some phone models support this, while others don’t.
To enable wireless ADB, connect your Quest to your phone via USB and open SideQuest. Click on the wireless toolbar button on the far left. On this screen, you can press ‘Enable Wireless’.
You can then physically disconnect your Quest from your phone and press the ‘Connect’ button next to the IP address at the bottom of the app’s wireless menu. This will connect your headset to SideQuest wirelessly, provided you’re on the same network, and allow you to sideload apps without a USB connection.
After enabling wireless, you shouldn’t need to connect your Quest physically again for a while. SideQuest should remember your Quest’s local IP address, allowing you to just press the connect button every time you want to sideload. If SideQuest forgets your Quest’s local IP address, you can find this in the Wi-Fi settings of your Quest by long-pressing on the network the headset is connected to.
If your headset is rebooted or the battery dies, wireless ADB will be disabled and you’ll have to perform the steps above again.
Launching Sideloaded Apps
In your Quest’s App Library, App Lab content (installed through SideQuest or otherwise) will be available on the main page, alongside Oculus Store apps.
Any other content installed through SideQuest will be listed under the ‘Unknown Sources’ tab. You can find this section by selecting the drop down menu in the top right of your Quest’s App Library, and scrolling down to select ‘Unknown Sources’.
A word of caution…
When sideloading, you do need to keep in mind that you are putting content onto your device that has not been approved by Meta and could potentially damage your device or be malicious in nature, even if it doesn’t appear so at first.
It is also important to be aware of the Oculus Content Guidelines when sideloading content, to ensure you’re not violating anything with the content you’re sideloading onto your device. You might want to give our report on Oculus’ Content Guidelines and sideloading a read before you jump into the thick of it.
Hopefully this guide helped you begin to navigate the world of sideloaded content on Quest.
This article was originally published in November 2019 but has been updated and re-published several times, most recently in January 2024. All the instructions will work for the original Oculus Quest, Meta Quest 2, Meta Quest Pro and Meta Quest 3.