Oculus Quest is a versatile VR headset because it is able to operate both in standalone wireless mode as well as PC-powered Oculus Link mode. One change to the BIOS settings on your PC, though, may be able to make the transition go more smoothly.
When I received the official Oculus Link cable from Facebook the first thing I did was test it. It worked well, but I was disappointed when I tried to let it charge my Oculus Quest while the PC slept. It simply didn’t work. I commented about it on Twitter and thankfully someone replied to let me know that some PCs include a BIOS setting which allows connected USB devices to charge even while the PC sleeps.
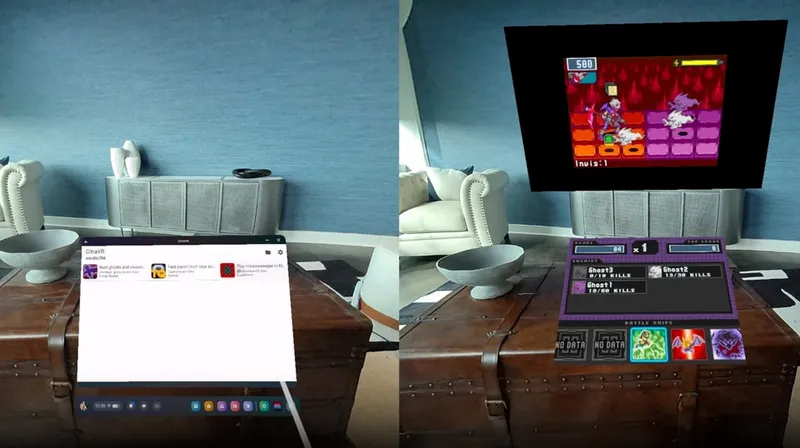
Now my Oculus Quest sits on an AMVR stand while plugged into my PC and charging — ready to run in PC mode by simply waking up the PC and activating the Oculus Link mode on the headset itself. If I want to use it in standalone mode I just unplug the fully charged headset and enjoy wireless freedom. This represents, to me at least, the best of both worlds as both keeping the headset charged and plugging in Oculus Link to my PC are extra steps that can sometimes keep me from a VR experience. After all, there are few things more frustrating in VR than being excited to try something new and discovering your headset isn’t charged.
For those unfamiliar, BIOS stands for “Basic Input Output System” and it is essentially the first software that loads when you turn on your PC before even the Windows operating system. So to see if your PC offers this setting you’ll have to start up the machine in a special mode which allows you to access the BIOS.
How To Access BIOS settings on your PC
On many PCs accessing the BIOS is accomplished by holding down a specific key during startup or while restarting the machine. One quick note before you attempt this — if you have a dual monitor setup be sure that both monitors are turned on in case BIOS tries to display on only one of your screens. The key you need to press varies by manufacturer. According to a post from Tom’s Hardware, these are the commands for each of the major manufacturers:
- ASRock: F2 or DEL
- ASUS: F2 for all PCs, F2 or DEL for Motherboards
- Acer: F2 or DEL
- Dell: F2 or F12
- ECS: DEL
- Gigabyte / Aorus: F2 or DEL
- HP: F10
- Lenovo (Consumer Laptops): F2 or Fn + F2
- Lenovo (Desktops): F1
- Lenovo (ThinkPads): Enter then F1.
- MSI: DEL for motherboards and PCs
- Microsoft Surface Tablets: Press and hold volume up button.
- Origin PC: F2
- Samsung: F2
- Toshiba: F2
- Zotac: DEL
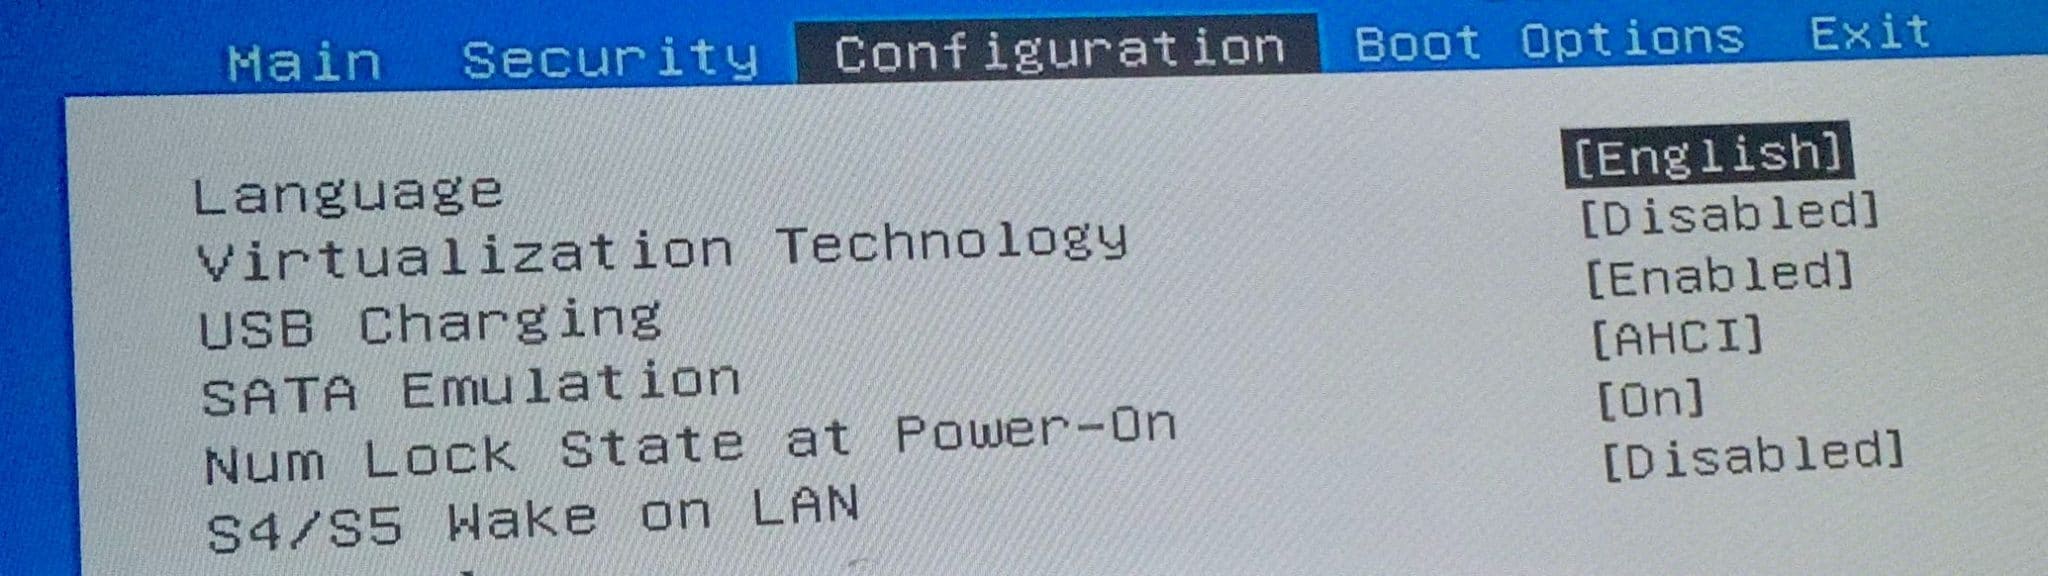
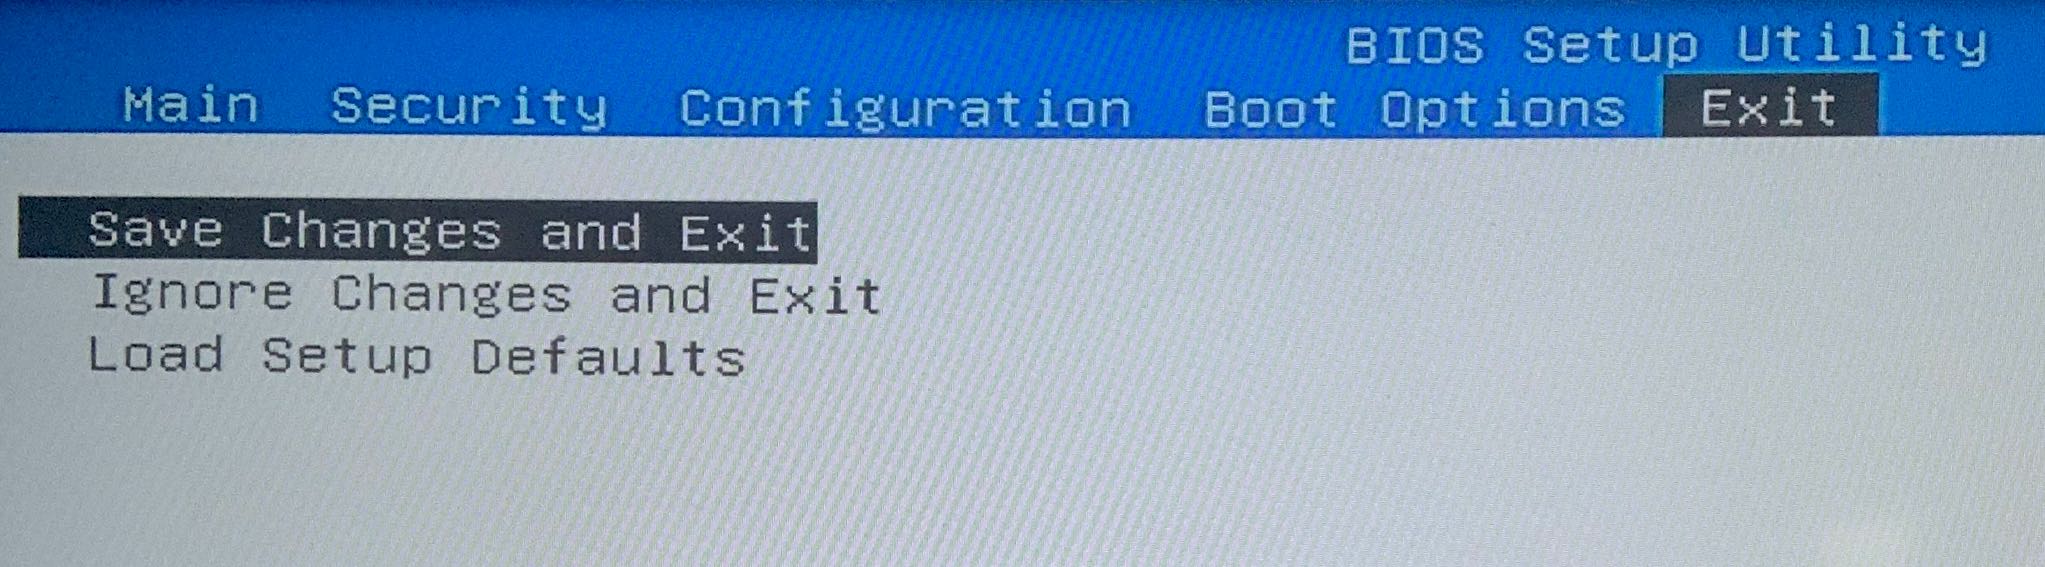
You can use the arrow keys on your keyboard to navigate between options in BIOS. Navigate to “Configuration” and down to “USB Charging”. Once you’ve “Enabled” the USB charging option you can go to exit option and hit “Enter” on “Save Changes and Exit.”
That should do it. Put your PC to sleep now and it should charge while plugged into the computer.
One note — after activating this feature my Quest I was able to charge from the USB-C port on the back of my PC but not from the USB-C port in the same area as my RTX 2080 graphics card.